iPhone HDR Video: Should You Leave It On or Turn It Off?
 Natalie Brooks · October 6, 2026 · 9 min read
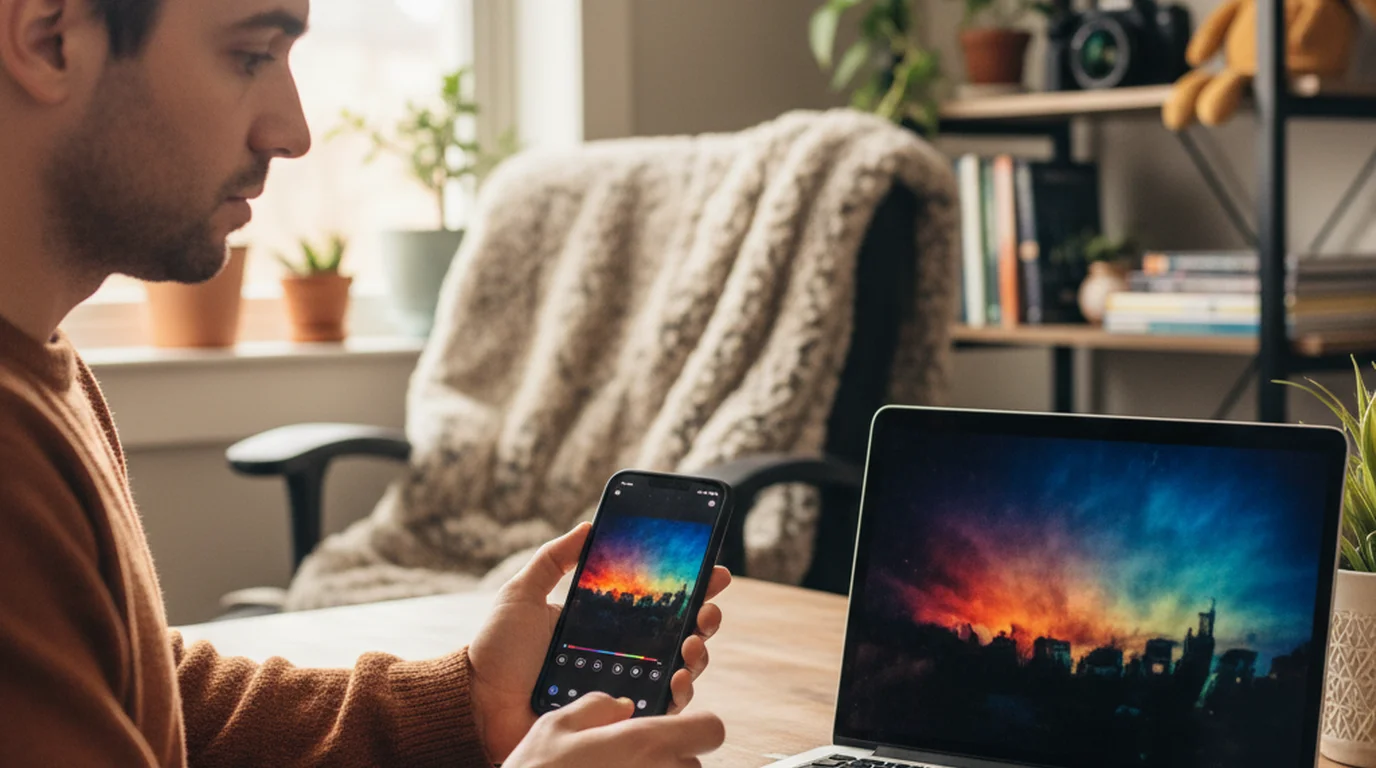
The clip looks great on the iPhone: bright highlights, deep shadows, skin that glows in window light. Then it lands in an editor, on a Windows laptop, or in a group chat and suddenly looks washed out, or so bright it's uncomfortable. That jump is iPhone HDR video doing what it was built to do, on a screen or app that wasn't built for it. Whether to keep HDR Video on comes down to where the footage goes next, not to how good it looks in the Photos app.
Leave iPhone HDR video on if your clips are watched on recent Apple devices or uploaded straight to YouTube. Turn it off in Settings > Camera > Record Video > HDR Video if the footage goes through an editor that isn't set up for HDR, or to people watching on SDR screens. HDR Video records 10-bit HLG video with Dolby Vision metadata.
Should you turn HDR video on or off? It depends where the clip goes
HDR isn't better or worse in the abstract. It's a different kind of file, and it only pays off when every step after the camera understands it. Match the setting to the last place the video will be watched:
| Where the footage goes | HDR Video | Why |
|---|---|---|
| Watched on recent iPhones, iPads, and Macs | On | Apple screens show the extra highlight and color range as recorded |
| Uploaded straight to YouTube | On | YouTube accepts HDR uploads and shows an SDR version on screens that can't display HDR |
| Posted to Instagram, TikTok, or other social apps | Test first | Handling varies by app version and device; check one test post on a non-HDR phone |
| Edited in an app that isn't set up for HDR | Off | An SDR timeline shows HLG footage flat and grey, and grading by eye rarely fixes it |
| Sent to clients, Windows PCs, or older phones | Off | Many SDR players don't convert HDR properly |
| Talking-head videos you post with light edits | Off for predictability | Skin tones and white walls look the same everywhere the clip is played |
The YouTube row is the cleanest case: according to YouTube's HDR upload guide, viewers on non-HDR devices see the video as standard dynamic range, converted automatically. Most other destinations are less predictable, which is why a single test post beats any rule of thumb.
iPhone HDR video is only an improvement when every step after the camera supports it. An HDR clip played on an HDR-capable Apple screen keeps its highlight detail; the same file opened in software that treats it as standard video looks flat and washed out. The deciding factor is the final viewing screen, not the recording.
How to turn off HDR video on iPhone
The switch lives in Settings, not in the Camera app. Apple's guide to adjusting HDR camera settings on iPhone gives the same path:
- Open Settings.
- Tap Camera.
- Tap Record Video.
- Turn off HDR Video.
Two things catch people out. First, the setting only affects new recordings; everything already in your library stays HDR. Second, HDR Video and photo HDR are separate: turning off HDR Video doesn't change how the iPhone takes still photos. If you switch HDR Video back on later, nothing else in Record Video changes, so your resolution and frame rate stay where you set them. For choosing those, the frame rate guide for YouTube covers when 24, 30, or 60 fps makes sense.
Why iPhone HDR video looks washed out or too bright elsewhere
Standard video is built for a brightness curve and color space that date back to HD television. iPhone HDR video uses something different on both counts. It's encoded with HLG (Hybrid Log-Gamma), a curve designed to hold far brighter highlights, in a wider color space, at 10 bits per channel. Ten bits gives 1,024 levels of brightness per color channel instead of the 256 in 8-bit video, which is why skies and window light keep their gradients instead of banding.
On top of that sits Dolby Vision metadata, which tells capable screens how to map the image to their brightness. Apple's developer documentation on HDR video with Dolby Vision describes it as Dolby Vision Profile 8.4, built to be backward compatible with HLG, so any HEVC decoder can still play the file.
Playing it isn't the same as showing it correctly, though. When an app ignores the HLG curve and the wider color space and treats the file as ordinary video, the image comes out flat, grey, and low in saturation: the classic washed-out look. When a player does show it as HDR on a phone that's also displaying normal app interface around it, the video can look much brighter than everything else on screen. Both are the same file, read two different ways.
iPhone HDR video is 10-bit HLG with Dolby Vision Profile 8.4 metadata, according to Apple's developer documentation. Ten-bit encoding stores 1,024 brightness levels per channel instead of 256. Software that reads the file as standard 8-bit video ignores the HLG curve and wide color space, which is what makes HDR clips look washed out.
How to convert an iPhone HDR video to SDR
Turning HDR off fixes future clips. For footage you've already shot, make an SDR copy instead of trying to grade the grey out by hand. Apple's guide to editing HDR video recorded on iPhone covers the built-in route:
- iMovie on iPhone or iPad: add the clip to a project, tap Share, tap Options, and turn HDR off. The export is standard dynamic range.
- iMovie on Mac: shares in SDR, so exporting from it converts the clip.
- Desktop editors: use the editor's HDR-to-SDR or color space conversion on the clip or timeline. A proper conversion maps the highlights down; dragging contrast and saturation sliders only approximates it.
Keep the original HDR file. If the clip later goes somewhere that supports HDR, the conversion can't be undone, but the original still has everything.
High Efficiency or Most Compatible: what it has to do with HDR
Settings > Camera > Formats offers two choices. High Efficiency records HEVC (H.265); Most Compatible records H.264, the older codec nearly everything can open. The catch is that iPhone HDR video is HEVC only, so choosing Most Compatible gives up HDR along with HEVC's smaller files.
If compatibility is the reason you're tempted to switch, there's a better fix: keep High Efficiency and turn off HDR Video. That removes the washed-out problem while keeping files small. Apple's notes on using HEVC media on Apple devices also point out that 1080p at 60 fps or lower is the most widely compatible HEVC on older devices, a useful default for clips you send to other people.
HDR video vs Apple Log: which one do you need?
They solve different problems. HDR Video is finished-looking footage, ready to post. Apple Log, available on iPhone 15 Pro and later, records a deliberately flat, grey image that keeps maximum highlight and shadow detail for color grading. You turn it on in Settings > Camera > Formats by enabling Apple ProRes and setting ProRes Encoding to Log, as described in Apple's guide to ProRes on iPhone.
Log only makes sense if you grade every clip in an editor such as Final Cut Pro or DaVinci Resolve. ProRes files are many times larger than HEVC, and ungraded Log footage looks worse than either SDR or HDR. For talking-head content, tutorials, and social clips, it's the wrong tool.
HDR for talking-head and scripted videos
Talking-head footage is where HDR's trade-off is easiest to see. Its strength is a bright window behind you or beside you: HDR keeps the window from blowing out while your face stays exposed. Its weakness is consistency. White walls, skin tones, and on-screen text shift the most when an HDR clip is converted or misread, and those are exactly what a viewer stares at. The talking-head video settings guide for iPhone covers lighting that makes HDR unnecessary in the first place.
If you read from a script while you film, Teleprompter-Scrolling Scripts, a free teleprompter app for iPhone, has its own HDR switch for each project in Camera mode. It records 10-bit HDR, with Dolby Vision on iPhones that support it, and it starts off, so a project headed for an editor stays SDR while one you post straight from Photos can use HDR. In our own shoots, that per-project split is the habit worth copying in any app: decide where the clip is going before you press record, not after.
Frequently Asked Questions
How can I turn HDR off on an iPhone video?
Open Settings, tap Camera, tap Record Video, then turn off HDR Video. The change applies to clips you record from then on; videos already in your library stay HDR. To make an SDR copy of an existing clip, export it from iMovie on iPhone with the HDR option switched off in the share Options.
Should I turn on or off HDR for videos?
Leave HDR on when your videos are watched on recent iPhones, iPads, and Macs, or uploaded straight to YouTube, which creates an SDR version for screens that can't show HDR. Turn it off when footage goes through an editor that isn't set up for HDR, or to people watching on Windows laptops and older phones.
What is HDR video on iPhone?
HDR Video is the iPhone camera setting that records 10-bit HLG video with Dolby Vision metadata. It keeps far more brightness and color detail than standard video, so highlights like windows and skies don't clip. On iPhone 12 models and later it's on by default, and it shows its full range only on HDR-capable screens.
Why do iPhone HDR videos look washed out on other devices?
The clip is HDR and the app or screen showing it is treating it as standard video. HLG uses a different brightness curve and a wider color space than SDR, so software that ignores that information displays the image flat, grey, and desaturated. Converting to SDR before sharing, or turning HDR Video off, fixes it.
Can you remove HDR from an iPhone video after recording?
Yes. In iMovie on iPhone, add the clip to a project, tap Share, tap Options, and turn HDR off before exporting; the result is a standard dynamic range copy. iMovie on Mac shares in SDR by default. Most desktop editors also have an HDR-to-SDR conversion that works better than correcting the image by eye.
Should I set my iPhone Camera to high efficiency or most compatible?
Keep High Efficiency. HDR video is encoded with HEVC, so the Most Compatible setting, which records H.264, gives up HDR along with the smaller file sizes. If compatibility is the problem, turn off HDR Video instead and keep High Efficiency; that removes the washed-out issue without doubling file sizes.
How to film in Apple Log?
Apple Log needs iPhone 15 Pro or later. Go to Settings, Camera, Formats, turn on Apple ProRes, then set ProRes Encoding to Log. Log footage looks flat and grey straight out of the camera on purpose; it's meant to be color graded in an editor such as Final Cut Pro or DaVinci Resolve before anyone sees it.
The short version
Keep iPhone HDR video on when your audience watches on Apple devices or YouTube, and turn it off when footage passes through an editor or goes to SDR screens. For clips already shot, export an SDR copy rather than correcting by eye, and keep High Efficiency on either way. For more on choosing a recording setup, see the comparison of free teleprompter apps.
Natalie BrooksNatalie Brooks is a video producer who works as a one-person crew for independent creators, corporate teams, and online educators. She writes about home studio setups, creator gear, and the production decisions that never come up in sponsored unboxings.
Read your script while you film
Teleprompter-Scrolling Scripts runs on iPhone, iPad, and Mac. Scroll your script over the camera, record, and choose HDR or SDR for each project.
Use Free Online Teleprompter Get the Free App