Interrotron Setup, Rental Cost, and DIY Alternatives: Complete Guide
 Natalie Brooks · July 30, 2026 · 8 min read
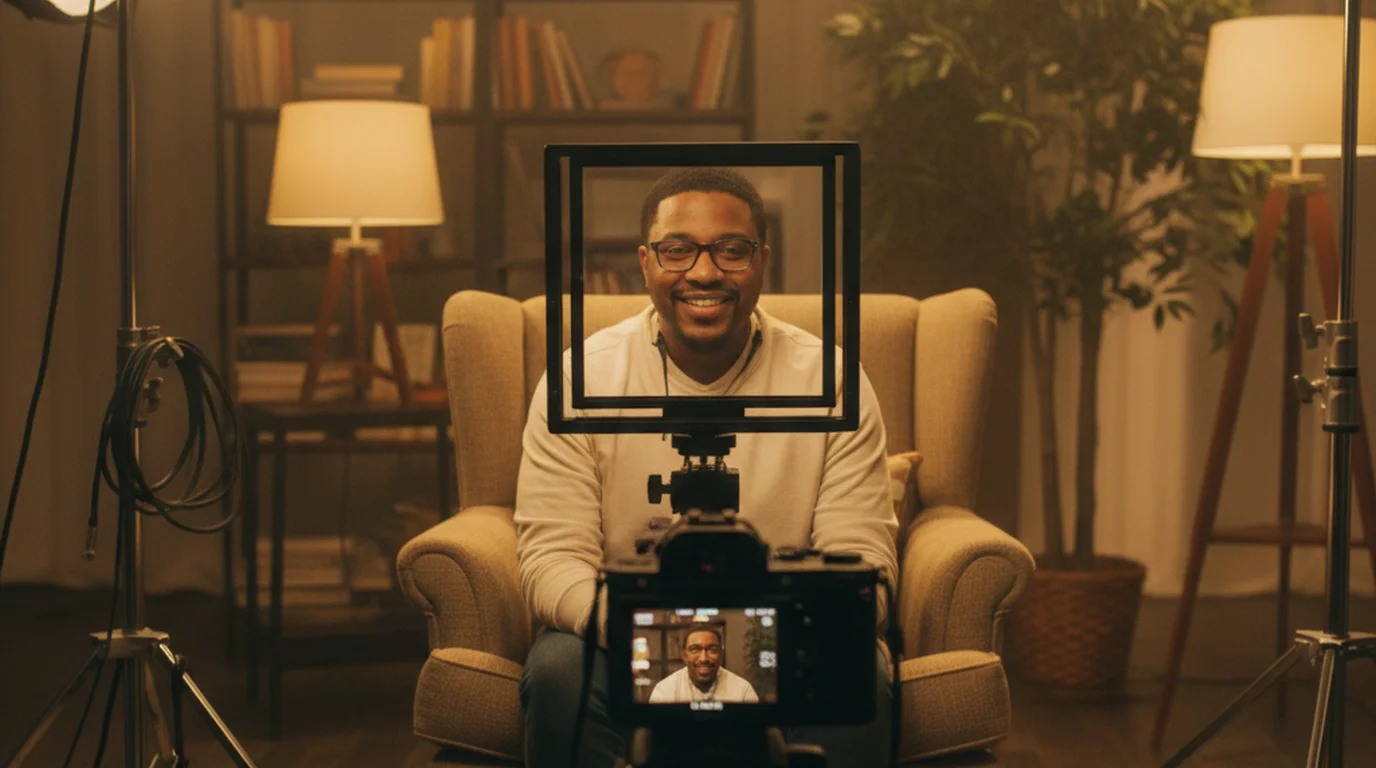
An interrotron interview is a documentary filming technique where the subject looks directly into the camera lens while simultaneously making eye contact with the interviewer — creating an on-screen intimacy that standard off-axis interview setups simply cannot match. The technology relies on a half-silvered beam splitter mounted in front of the camera, which reflects the interviewer's face toward the subject while remaining optically transparent to the recording lens. Director Errol Morris invented the device in the early 1990s and used it throughout The Fog of War and The Thin Blue Line to draw out confessional performances from subjects who would never have spoken as directly to a camera pointed at them cold.
An interrotron works by positioning a half-silvered mirror at a 45-degree angle in front of the camera lens. The interviewer sits off to the side, their face displayed on a small monitor. That image reflects off the mirror toward the subject, who sees the interviewer's eyes at the exact center of the lens — so the camera records them looking straight at the viewer. Rental rigs run $200–$500 per day; a DIY build costs $150–$400.
What Is an Interrotron and How Does It Work?
The word "interrotron" blends "interview" and "terror" — Morris's tongue-in-cheek description of what it felt like to stare into the device as a subject. Mechanically, it's a beam-splitter interview system. A half-silvered mirror (typically with a 50/50 transmission-to-reflection ratio) sits in front of the lens at a 45-degree angle. A small monitor facing the mirror displays the live video feed of the interviewer, who is seated off-camera but facing the lens axis. The subject sees the interviewer's face reflected in the mirror — positioned optically at the lens center — and the camera sees straight through the mirror to record the subject.
The result is genuine direct-to-lens eye contact. This is different from asking someone to "look at the camera" — which almost always produces a self-conscious, stiff performance. When a subject thinks they're talking to another person, they talk like a person. Blinks, micro-expressions, and emotional pauses all arrive naturally rather than being performed for an instrument. For documentary filmmaking, corporate testimonials, and journalistic interviews, that authenticity is the entire point.
Errol Morris has described the interrotron as solving a fundamental problem in documentary filmmaking: the camera creates a barrier between subject and viewer. According to a 2019 interview with the The Guardian, Morris developed the device after noticing that subjects in his films spoke differently when they believed they were speaking to a person rather than a machine — more vulnerably, more directly, and with greater emotional consistency.
Interrotron Setup: The Core Components
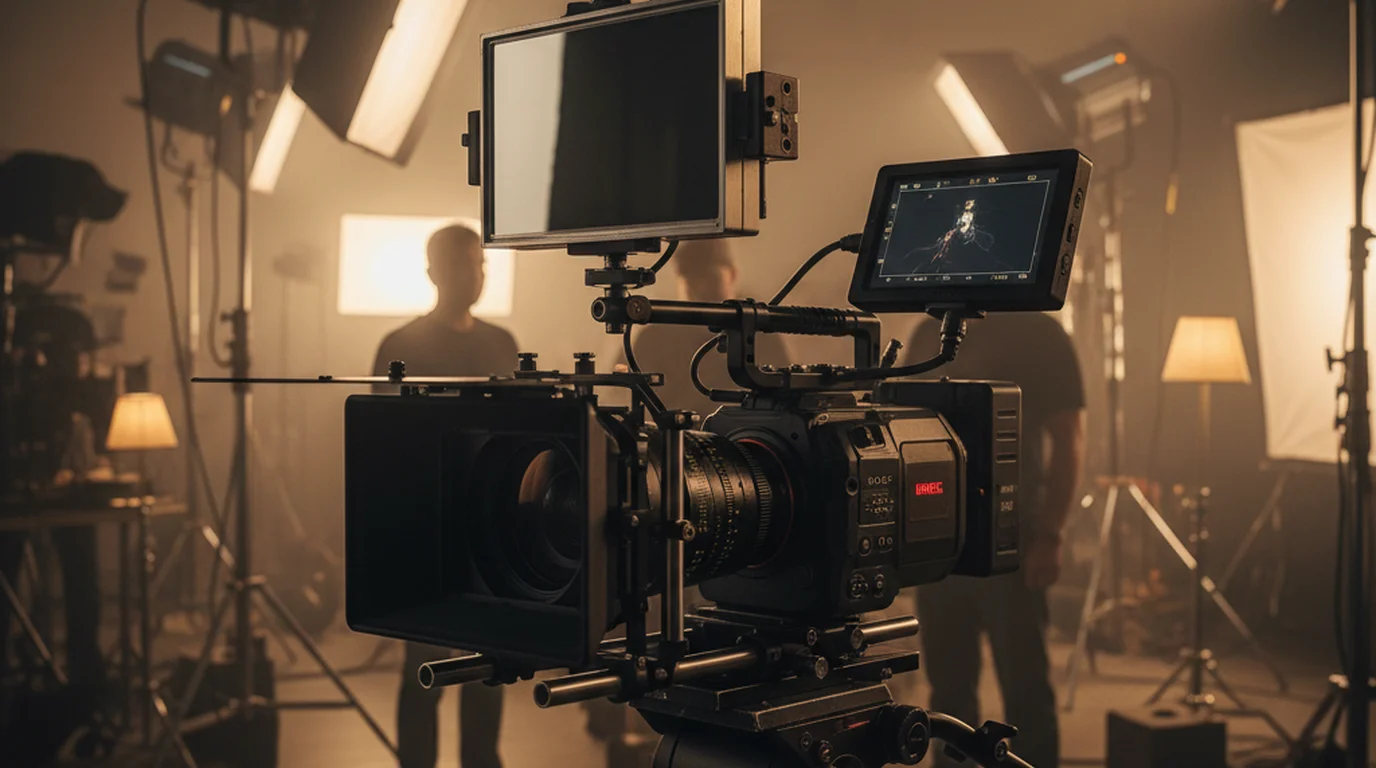
On a professional interrotron shoot, the rig has four physical components that have to work together cleanly. Get any one of them wrong and the effect collapses.
The beam-splitter mirror. This is the heart of the system — a half-silvered glass or acrylic sheet that simultaneously transmits and reflects light. For most interview conditions, a 50/50 ratio works: 50% of the light from the monitor reflects toward the subject's eyes, and 50% of the light from the subject passes through to the lens. Higher-transmission mirrors (60/40 or 70/30) favor the camera at the cost of a dimmer interviewer reflection.
The mounting frame. The mirror must be held at exactly 45 degrees to the lens axis, rigid enough that it doesn't vibrate during the interview. Professional rigs use matte-box-style aluminum rail systems. The frame also needs to hold the mirror at a consistent distance from the lens — too close and you'll see the edge of the mirror in frame; too far and the reflection angle shifts.
The interviewer monitor. A small HDMI monitor (5–7 inches is typical) displays the live feed of the interviewer's camera, which is positioned off to the side. Brightness is critical: the monitor needs to output enough light to compete with the key light on the subject's face. On production shoots where I've run this setup, I've found that monitors need to be set between 400–600 nits to balance against a standard softbox key light at about 3 feet.
The secondary camera. Full interrotron rigs use two cameras: one behind the beam splitter recording the subject, and one recording the interviewer. The interviewer's live feed goes to the monitor on the subject's side. Both cameras run simultaneously — you end up with coverage of both parties, which gives you edit flexibility and makes the system feel like a real two-way conversation to the subject.
Interrotron Rental: What It Costs and Where to Find One
Unless you're shooting interrotron interviews every month, rental is almost always the better call. The hardware is fragile, requires precise calibration, and doesn't travel easily. Owning a unit only makes financial sense if you're using it at least 10–15 days per year.
Rental rates as of 2026: Full interrotron rigs from established camera houses in Los Angeles and New York run $200–$500 per day, typically inclusive of both cameras, the beam-splitter frame, and the monitor. Atlanta, Chicago, and Austin-based houses tend to run 15–20% lower than coastal markets. Some rental houses also offer half-day rates for shoots under 4 hours — usually 60–70% of the daily rate.
Peer-to-peer rental platforms like Sharegrid and KitSplit list interrotron components from individual owners at rates of $100–$250 per day. The tradeoff is that individual-listed rigs vary more in quality and you may not get the same pre-calibration that a professional house provides. Budget an extra 30 minutes on set to dial in the mirror angle and monitor brightness if you're going this route.
Commercial units for purchase: The Eye Direct (the most widely used commercial interrotron-style device as of 2026) retails between $2,000 and $4,000 depending on the configuration. It's more compact than a traditional two-camera interrotron rig and uses a single-camera setup with a flip-mirror system rather than a separate interviewer camera feed. For corporate video producers who shoot talking-head content regularly, it's the most practical ownership option.
The commercial interrotron equipment market is small but active. According to equipment tracking data from Sharegrid's 2024 rental index, beam-splitter interview rigs have a utilization rate of approximately 40–60% on the days they're listed — significantly higher than average specialty camera gear — indicating consistent professional demand that outpaces casual use.
DIY Interrotron: Building a Beam-Splitter Rig on a Budget
A functional interrotron camera rig can be built for $150–$400 depending on how seriously you want to go. The optical principle is simple; the engineering challenge is holding everything rigid and at the right angle while keeping the rig light enough to not become a liability on a one-person shoot.
The mirror. Half-silvered acrylic sheets are available from optical supply retailers and some Amazon sellers in the $30–$80 range for an 8×10 inch sheet. Glass beam splitters are optically cleaner but heavier and significantly more fragile. For most interview setups, 1/4-inch acrylic is adequate and survives shipping and transport without the anxiety of glass. Look for a 30/70 or 50/50 coating — the coating specification determines your transmission-to-reflection ratio.
The mount. If you're comfortable with basic fabrication, an aluminum angle bracket and a matte box rail attachment gives you a solid, adjustable mount for around $40–$60 in hardware. A 3D-printed mounting bracket (files are available from the filmmaking community on Thingiverse and similar platforms) can be even lighter, though print-quality matters — flex in the mount means the mirror angle shifts as the camera moves.
The monitor. Any small HDMI field monitor in the $80–$150 range works. You need brightness above 400 nits for indoor interviews with standard lighting. Portability matters here: you want something battery-powered or with a USB-C option so you're not running cables across the set. I've used the Feelworld F5 Pro on DIY builds and it handles the brightness demands without issue.
The real calibration challenge with a DIY build is matching your monitor brightness to your key light intensity so the interviewer's reflection appears clearly in the subject's eyes without washing out or disappearing. On set, I'll always do a test shot where I zoom into the subject's eyes in playback — if I can see the interviewer's image reflected there at normal exposure, the balance is right.
Interrotron vs. Teleprompter: Overlapping Technology, Different Purpose
A question that comes up on nearly every corporate video shoot where I've proposed an interrotron: "Isn't that just a teleprompter?" The optical mechanism is identical — both use a half-silvered mirror in front of a camera lens — but the purpose is completely different.
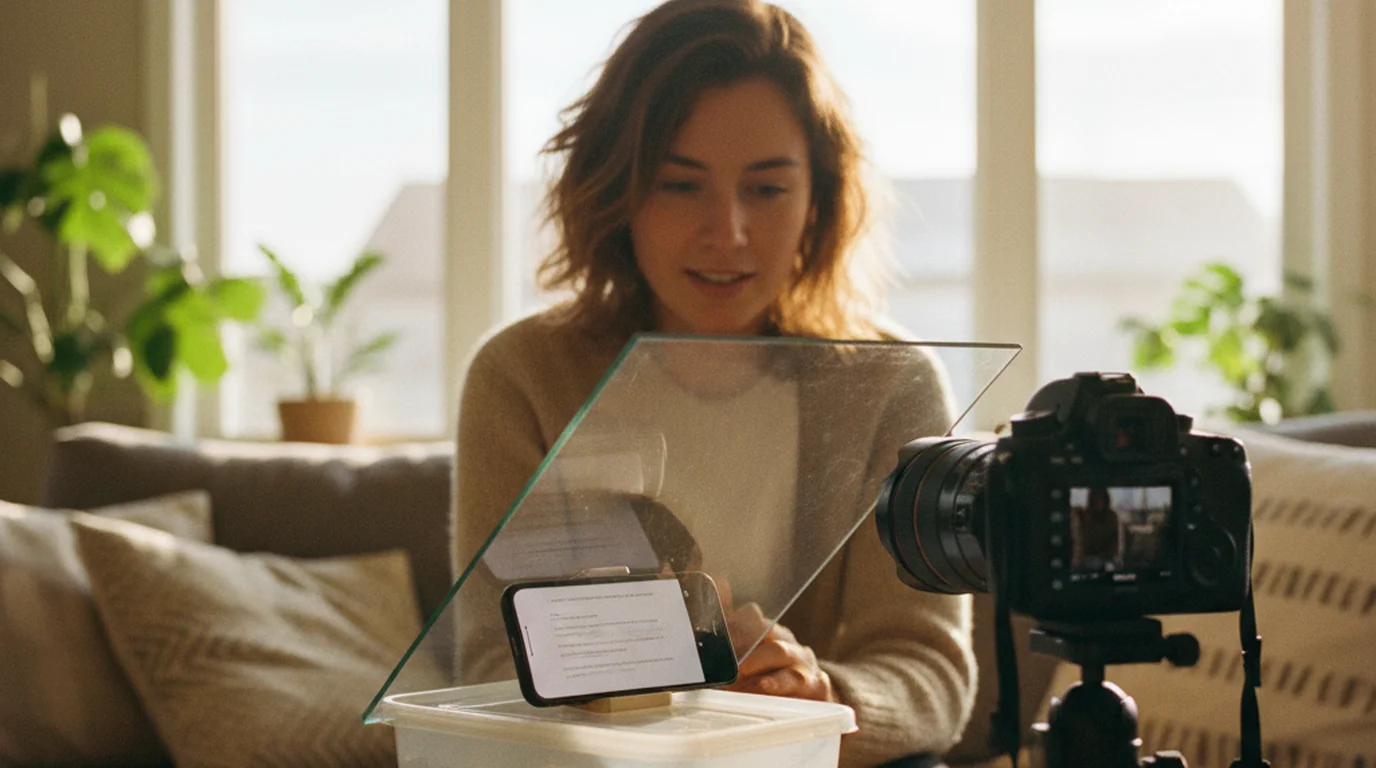
A teleprompter reflects scrolling script text onto the mirror so the speaker can read their lines while appearing to look at the camera. The camera sees through the mirror; the speaker reads text reflected off it. An interrotron reflects a live video feed of the interviewer rather than text. The subject isn't reading anything — they're making eye contact with a person.
The practical overlap is that some productions use both simultaneously: a teleprompter-style text scroll for a scripted introduction or closing statement, then switch to an interrotron-style interviewer feed for the Q&A portion. If you're already running a free online teleprompter for scripted sections of your production, the mirror hardware is already in place — adding an interviewer feed monitor is a matter of swapping what's displayed on the screen behind the mirror.
For producers doing regular talking-head work who want the direct-to-camera effect without the full interrotron rig, a teleprompter with a conversational host image displayed (rather than scrolling text) achieves a similar result at lower cost. It's not identical — the subject knows they're looking at a still image — but it eliminates the off-axis gaze problem that makes standard interviews feel distant.
When to Use (and When to Skip) the Interrotron
The interrotron produces a distinct visual style that isn't appropriate for every project. On productions where I've brought it out versus left it in the case, the decision usually comes down to three factors.
Use it when emotional directness is the goal. Testimonials, documentary confessionals, first-person narrative interviews, and any format where you want the viewer to feel like the subject is speaking to them personally — these are interrotron territory. The Errol Morris interview technique built a career around this effect precisely because it unlocks a quality of on-screen presence that conventional setups can't replicate.
Skip it when the content is informational rather than personal. Expert explainer videos, product demos, and training content usually don't benefit from the intensity of direct eye contact. A slightly off-axis eyeline (looking just beside the lens toward the interviewer) is often more appropriate for those formats — it reads as conversational rather than confessional.
Skip it on tight-budget shoots where setup time matters. The interrotron adds 20–45 minutes of setup and calibration time that a lean production schedule may not accommodate. If you're producing a high volume of short corporate interviews in a single day, the math often doesn't work in its favor. Know the break-even point for your workflow before committing.
Frequently Asked Questions
How does an Interrotron work?
An interrotron uses a half-silvered mirror (beam splitter) mounted at a 45-degree angle in front of the camera lens. The interviewer's face is projected onto the mirror via a monitor or second camera feed. The subject sees the interviewer's eyes in the same optical axis as the camera lens, creating genuine eye contact while the camera records the subject looking directly into the lens.
What is the difference between eye direct and Interrotron?
Eye Direct is a commercial product that uses the same beam-splitter principle as the Interrotron but comes in a more compact, pre-built form factor. The Interrotron is the original device invented by Errol Morris in the 1990s and typically refers to larger, dual-camera rigs. Eye Direct is a modern commercial version designed for documentary and corporate video producers who need portability.
How much does an Interrotron cost?
Renting a professional interrotron rig from a production house typically costs $200–$500 per day in major US cities. Purchasing a commercial unit like the Eye Direct runs $2,000–$4,000. A DIY beam-splitter build using a half-silvered mirror, aluminum frame, and a small monitor can be assembled for $150–$400 depending on mirror quality and mounting hardware.
What equipment do you need for an Interrotron?
The core components are: a half-silvered beam-splitter mirror (typically 50/50 transmission ratio), a rigid mounting frame that positions the mirror at exactly 45 degrees in front of the lens, a small display or monitor showing the interviewer's face, and a camera positioned directly behind the mirror. You also need controlled lighting to balance the subject's illumination with the monitor brightness so the mirror reflection is visible but not distracting.
Can you build a DIY interrotron?
Yes. A functional DIY interrotron can be built for under $300 using a half-silvered acrylic or glass mirror, a 3D-printed or aluminum mounting bracket, and a small HDMI monitor. The critical factors are the mirror's transmission ratio (50/50 works for most conditions), the angle precision (must be exactly 45 degrees to the lens axis), and the monitor brightness relative to your key light.
What is an interrotron camera setup used for?
Interrotron camera setups are used primarily for documentary film interviews, corporate talking-head videos, testimonial recordings, and journalistic interviews where authentic eye contact with the viewer is essential. Errol Morris pioneered the technique in films like The Fog of War to create an intimate connection between subject and audience that standard off-axis interview setups cannot achieve.
How do you light an interrotron interview?
Lighting an interrotron interview requires balancing two elements: the key light on the subject and the brightness of the monitor projecting the interviewer's image onto the beam splitter. If the monitor is too dim compared to the key light, the reflection disappears. If the monitor is too bright, it creates a hot spot visible on the subject's eyes. Start with your key light, then match the monitor brightness until the interviewer image is visible in the subject's eyes at approximately 30–50% opacity.
Where can I rent an interrotron?
Interrotron rigs are available from camera rental houses in major US production markets including Los Angeles, New York, Chicago, and Atlanta. Rental rates typically run $200–$500 per day for a complete rig. Online equipment rental platforms like Sharegrid and KitSplit sometimes carry interrotron units from individual owners at lower rates — typically $100–$250 per day.
Natalie BrooksNatalie Brooks is a video producer who works as a one-person crew for independent creators, corporate teams, and online educators. She writes about home studio setups, creator gear, and the production decisions that never come up in sponsored unboxings.
Script Your Interviews Without Looking Away
Use Teleprompter-Scrolling Scripts to prepare and review your interview scripts before a shoot, or as a reference monitor during talking-head segments. Free on iPhone, iPad, Mac, and in any browser.
Use Free Online Teleprompter Get the Free App