Teleprompter for Mac: Complete Setup and Recording Guide
![]() Wendy Zhang · May 20, 2026 · 9 min read
Wendy Zhang · May 20, 2026 · 9 min read
A teleprompter for Mac solves a problem that iPhone and iPad can't: keeping a full scrolling script visible during desk recording, Zoom calls, livestreams, and multi-take YouTube sessions — all without leaving your seat. This guide covers every practical setup Mac creators actually use, from solo YouTube tutorials to investor pitches on Zoom, with the exact settings that make reading look natural on camera.
Teleprompter-Scrolling Scripts is free to download on the Mac App Store and works fully offline. Scripts are stored locally, so your workflow never depends on a Wi-Fi connection or an account login. The app runs in two modes: Camera mode for recording directly inside the app, and Prompter mode for any situation where a separate camera or video tool handles the recording.
Why Mac is different from iPhone and iPad for teleprompter use
Recording on Mac is a fundamentally different physical experience than recording on an iPhone or iPad. When you shoot on iPhone, the camera moves with you — you can angle it, tilt it, hold it at arm's length. When you record on Mac, the camera is fixed. The FaceTime camera sits above the display at a set height, typically 50 to 80 centimeters from your face. You are not going to reposition it.
That constraint actually works in your favor for teleprompter use. Because the camera position is predictable and your sitting distance is consistent, you can dial in your text area position once and it stays right. The script sits in the upper portion of the screen — close to that FaceTime camera dot — and your eyes travel a short, repeatable path between the words and the lens.
Mac recording also handles a different type of content than mobile. You are not shooting 60-second Instagram clips at your desk. You are recording full-length YouTube tutorials, 20-minute course modules, webinar segments, or multi-section explainer videos. Scripts run longer. Sessions run longer. That means scroll speed calibration and text readability matter more — a setup that feels fine for two minutes starts showing its problems at minute eight.
The other difference is context. On Mac, the teleprompter is almost always sharing the screen with other apps: Zoom, OBS, StreamYard, QuickTime, your browser. The teleprompter has to either integrate cleanly with that environment (Prompter mode) or take over the camera entirely (Camera mode). Knowing which mode to use in each situation is the core skill this guide teaches.
Mac teleprompter use is defined by a fixed camera position, longer recording sessions, and the need to share the screen with other recording tools. Getting those three factors right is what separates a setup that feels natural from one that produces robotic-looking footage.
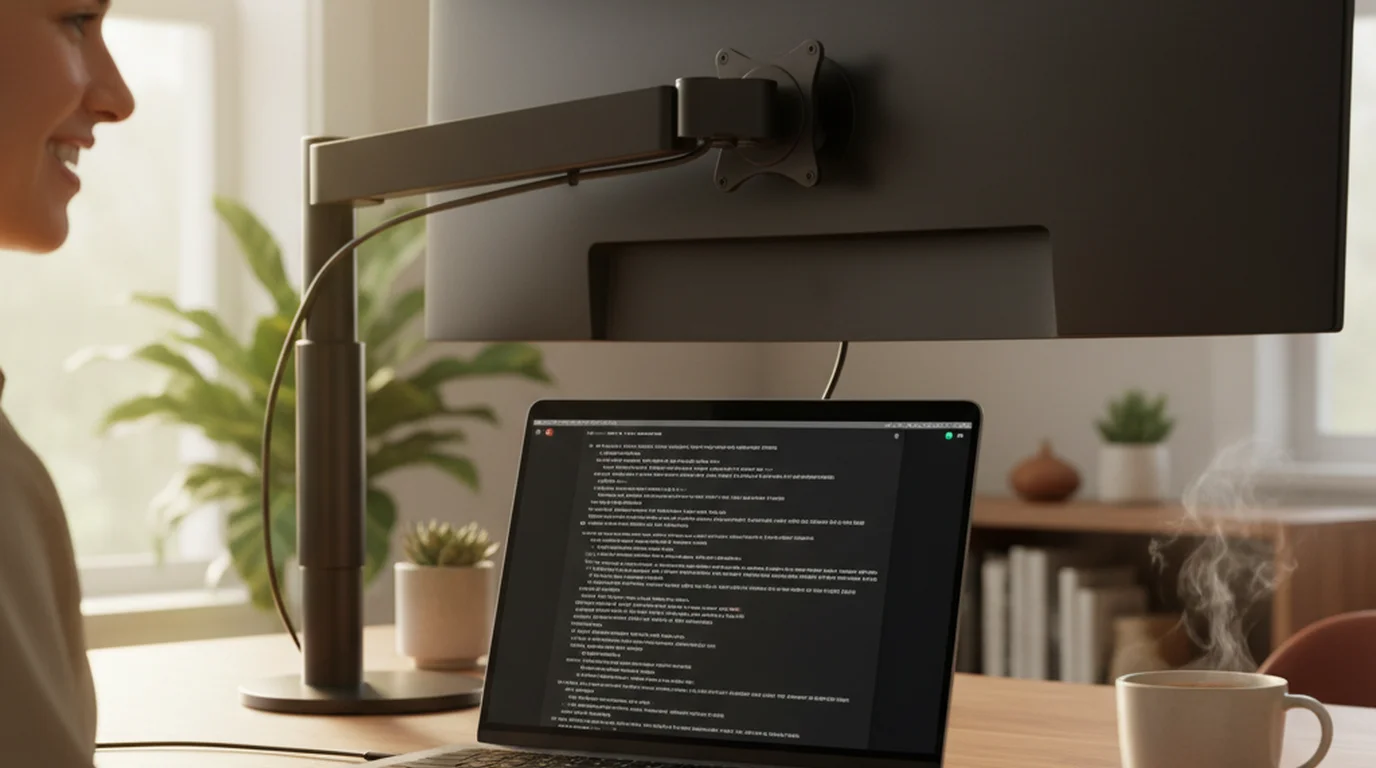
Teleprompter for Mac: Zoom calls, interviews, and presentations
Prompter mode is the feature that makes a teleprompter for Mac genuinely useful for calls — not just desk recording. In Prompter mode, the app displays your scrolling script without activating the Mac camera. Zoom, Google Meet, Teams, or any other call tool continues using the webcam normally. You read from the script; the other person sees you looking at the camera.
This setup handles several situations that iPhone and iPad cannot replicate cleanly. Run Prompter mode alongside Zoom for talking-point cards before a client call, bullet points during a live panel, or a full script for an investor pitch you cannot afford to fumble. For media interviews where you are on camera but reading pre-prepared answers, Prompter mode keeps the text in a resizable window you can position near your webcam. For a broader look at how teleprompter overlays work across all video call platforms, see the guide to teleprompter overlays for video calls.
You can scroll manually with the trackpad or keyboard, or use voice commands — "next," "pause," "previous" — to move through the script hands-free. Voice commands are especially useful during podcast recordings and webinars where your hands are occupied with slides or screen sharing.
For online workshops and presentations, Prompter mode turns your Mac into a proper cue card system. A host can run through a 45-minute workshop with the full script scrolling at eye level, maintaining eye contact with the camera throughout. No printed notes, no tab-switching, no missed transitions.
- Zoom calls and video meetings: Prompter mode window alongside the call, positioned near the webcam.
- Media and investor interviews: Manual scroll or voice commands for prepared answers.
- Online workshops and webinars: Full script scroll during live sessions, hands-free navigation.
- Speech and pitch rehearsal: Prompter mode for practice runs before the real call.
Check the FAQ page for common questions about running Prompter mode alongside third-party call software.
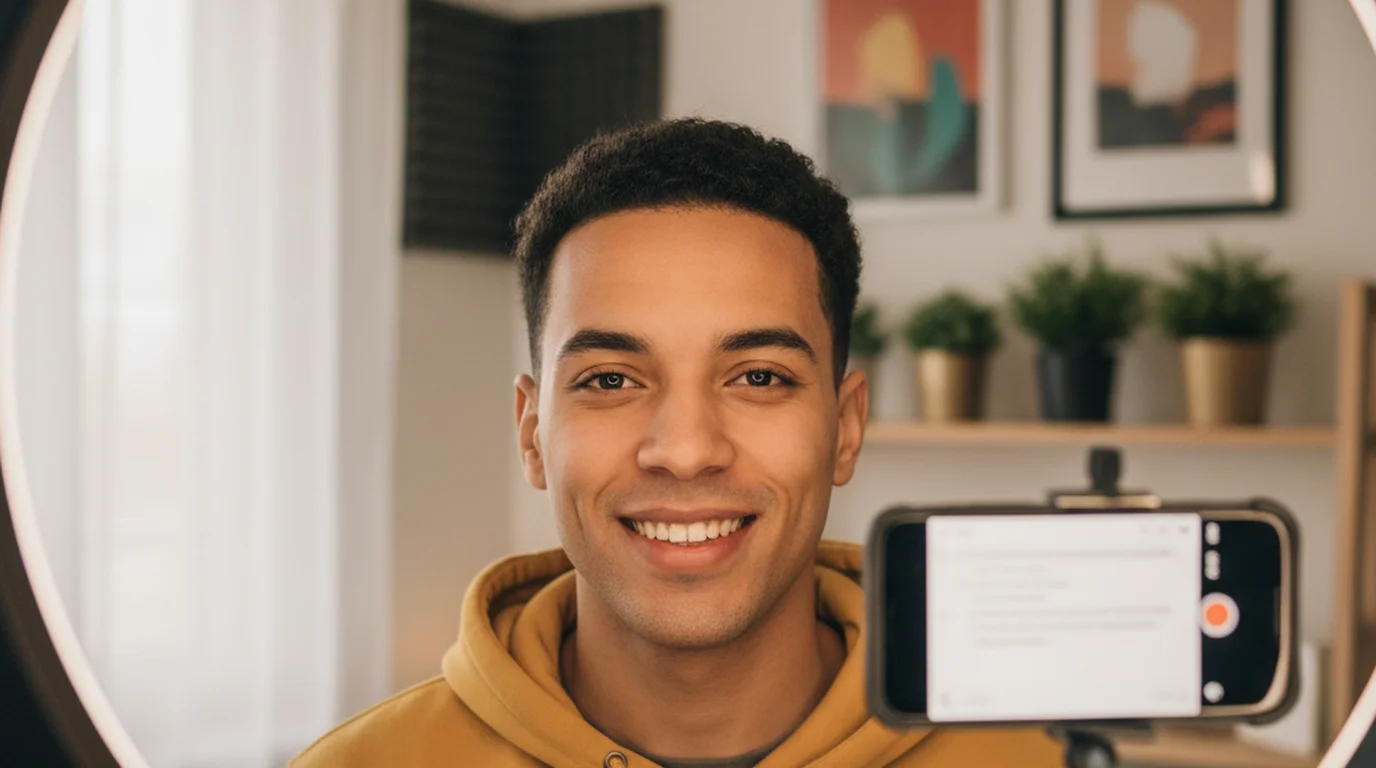
Mac teleprompter setup for desk recording and YouTube videos
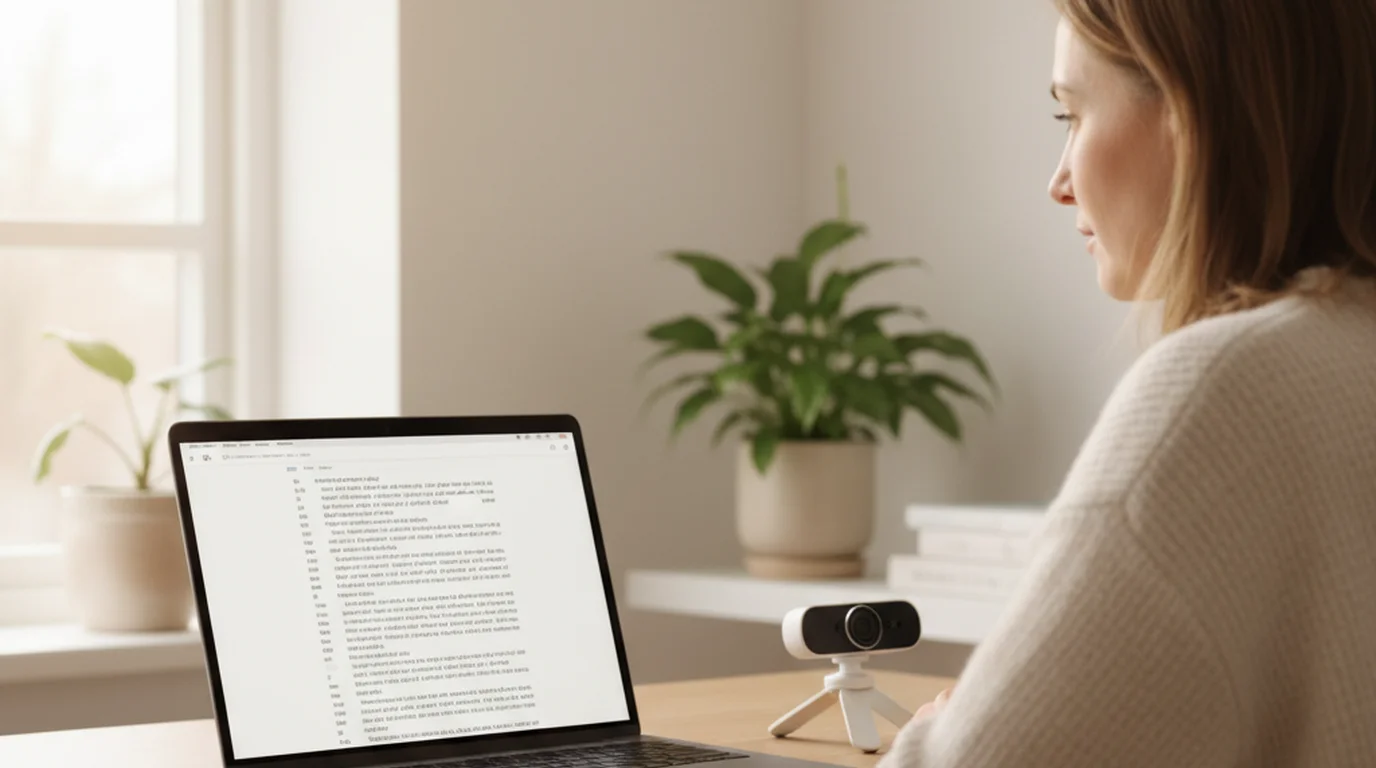
Camera mode is what you use when the Mac itself is the recording device. The app activates the built-in FaceTime camera, displays a live preview, and overlays the scrolling script on top. You record a video file directly inside Teleprompter-Scrolling Scripts. No QuickTime, no external camera app, no second window to manage.
The most important setup decision in Camera mode is where you place the text area. The FaceTime camera is at the very top center of the display. Put the text area in the upper center of the screen, close to that camera dot, and your eye movement between the script and the lens becomes nearly invisible to viewers. Move the text area to the bottom or sides and you will see the gaze shift in the footage.
Text area width matters too. Full-width text forces your eyes to travel left to right across a wide field — the same problem news anchors have with poorly set teleprompter copy. Use a narrow column of two to three lines, centered at the top of the screen. Your eyes stay in a small zone near the camera.
Font size depends on your actual sitting distance, not a default setting. At standard desk distance (roughly 60cm), 48pt is a reasonable starting point. Adjust up if you find yourself leaning forward to read, adjust down if the text feels like it is shouting.
Scroll speed calibration is where most new users spend too little time. Set the speed slightly slower than your natural speaking pace, then rehearse the first 30 seconds. If you feel rushed, slow it down. If you feel like you are waiting for the next line, speed it up by one increment. The goal is a speed where you can pause mid-sentence for emphasis without losing your place.
This setup works consistently for YouTube tutorials, product demo recordings, explainer videos, and course lesson segments — any content where the Mac is sitting on a desk and you want clean eye contact without memorizing the script.
Teleprompter for Mac livestreams and podcast recording
Livestreaming and podcast recording are where Prompter mode earns its keep for Mac users who are not recording inside the teleprompter app itself.
For OBS or StreamYard livestreams, run Prompter mode in a window outside your capture frame. Drag it to a corner of the screen that OBS is not capturing, or use a second monitor if you have one. The script scrolls, you read it, and your stream audience sees only your camera feed. This approach works cleanly for solo streams, co-hosted shows, and product launch streams where you want to hit specific talking points without sounding scripted.
For podcast audio recording — whether you are using GarageBand, Logic, Audacity, or a hardware recorder — Prompter mode functions as a large-format script reader. Keep the full episode outline or word-for-word script on screen, navigate sections with voice commands or keyboard shortcuts, and record without looking down at printed notes. The result is audio that stays on topic with fewer fumbled transitions and fewer retakes.
For webinars with multiple hosts or co-presenters, each person can run their own instance of the app on their own Mac. There is no shared session or account requirement — each presenter loads their segment of the script locally and runs it independently. Transitions between presenters become cleaner because everyone has their own cue system rather than passing a single set of notes back and forth.
For livestreams and podcasts, the key advantage of Prompter mode is that it adds a professional cue system to any recording setup without touching your camera source or audio chain.
Prompter mode vs Camera mode on Mac: which to use when
The choice between Prompter mode and Camera mode comes down to one question: is the Mac camera the primary recording device for this session?
Use Camera mode when:
- You are recording a YouTube video, course lesson, or demo inside the teleprompter app.
- The Mac FaceTime camera is the only camera in the setup.
- You want a single-app workflow: write, read, and record in one place.
- The recording is a standalone piece of content, not a live call or stream.
Use Prompter mode when:
- You are on a Zoom, Google Meet, or Teams call and need talking points visible.
- You are livestreaming through OBS, StreamYard, or a similar tool.
- You are recording podcast audio and the camera is not part of the workflow.
- You are using an external camera (DSLR, mirrorless, webcam) that connects through another app.
- You are rehearsing a speech or presentation and do not need to capture the session.
Both modes support pausing, manual rewind, and voice commands. Switching between them is a single tap in the app. The practical habit is to start every session by asking which tool owns the camera, then choosing the mode that leaves the camera in the right hands.
If you also record on mobile, the iPhone teleprompter and iPad teleprompter use the same mode logic — Camera mode for in-app recording, Prompter mode when another device or app handles the camera.
Settings that matter for a Mac teleprompter workflow
Mac teleprompter settings are more forgiving than mobile settings because your recording distance and camera position are consistent from session to session. Once you find the right configuration, you rarely need to change it.
Text area position: Top center of the screen, as close to the FaceTime camera dot as practical. For widescreen displays, keep the text area centered horizontally rather than spreading it edge to edge.
Text area height: Two to four lines for Camera mode sessions where eye contact is the priority. A taller reading area for Prompter-only sessions — speeches, podcast prep, webinar outlines — where you want more script visible at once without scrolling as frequently.
Font size: Start at 48pt for a standard 60cm desk distance. Increase by 4pt increments if you find yourself squinting or leaning forward. The right size is one where you can read without conscious effort.
Scroll speed: 2 to 3 lines every 3 to 4 seconds is a practical starting baseline for conversational speech. Adjust down for technical content where the audience needs time to absorb each point. Adjust up for faster-paced content or if you naturally speak quickly.
Text color: White text on a dark semi-transparent background reduces eye strain over long sessions. Avoid pure black backgrounds at full opacity in Camera mode — the overlay becomes distracting in the live preview. A 70 to 80% opacity dark overlay lets the camera preview remain visible beneath the script.
Line spacing: Loose line spacing (1.4 to 1.6x) improves readability for longer scripts. Tight spacing is harder to track when you are also watching the camera preview.
These settings are all adjustable inside Teleprompter-Scrolling Scripts. The fastest way to find your optimal configuration is to record a 90-second test clip, watch the footage once, identify the biggest friction point (squinting, losing your place, rushing), and fix that single setting before re-recording.
Frequently Asked Questions
Is there a free teleprompter for Mac?
Yes. Teleprompter-Scrolling Scripts is free to download on the Mac App Store. You can paste scripts, adjust text size and scroll speed, and record using Camera mode or read using Prompter mode at no cost. If you prefer not to install anything, the online teleprompter runs in Safari or any browser — useful for quick Zoom prep or practice runs.
Does the teleprompter app work with Zoom on Mac?
Yes. Run Teleprompter-Scrolling Scripts in Prompter mode alongside your Zoom window. Prompter mode does not activate the Mac camera, so Zoom uses your camera normally while the script scrolls in a separate window you can read from.
Can I record YouTube videos with a Mac teleprompter?
Yes. Camera mode activates the Mac's built-in FaceTime camera and overlays the scrolling script on top of the live preview. Position the text area in the upper center of the screen, close to the camera dot, so your eyes stay on the lens while you read.
Does the Mac teleprompter work offline?
Yes. Scripts are stored locally on your Mac and the app runs entirely offline. There is no account login or cloud sync required, so you can record in classrooms, studios, or locations with weak Wi-Fi without interruption.
For a full Mac autocue comparison — including MacBook Air, MacBook Pro, iMac, and Continuity Camera — see the best autocue app for Mac and MacBook guide.
 Wendy ZhangI build Teleprompter-Scrolling Scripts for creators who want a simple, reliable way to read scripts on iPhone, iPad, and Mac.
Start recording on Mac without memorizing your script
Teleprompter-Scrolling Scripts is free for Mac, iPhone, and iPad. Local scripts, no account required, Camera mode and Prompter mode included.
Use Free Online Teleprompter Get the Free App