Teleprompter App for Video Recording: Complete Setup Guide
![]() Wendy Zhang · May 20, 2026 · 9 min read
Wendy Zhang · May 20, 2026 · 9 min read
A teleprompter app for video recording does one job: it lets you read a script while a camera captures your face, and the viewer shouldn't be able to tell. Most apps fail at this because they weren't designed specifically for video. This guide covers what to look for, how to set it up on iPhone and Mac, and the script habits that make on-camera delivery sound natural.
Teleprompter-Scrolling Scripts is a free teleprompter app for iPhone, iPad, and Mac with a dedicated Camera mode for video recording. The script scrolls over the live camera view while the app records the video internally — one workflow, one app, no internet required.
Choosing a teleprompter app for video recording
Three things separate a teleprompter app built for video recording from a basic text scroller, and they're not obvious until you're in the middle of a recording session.
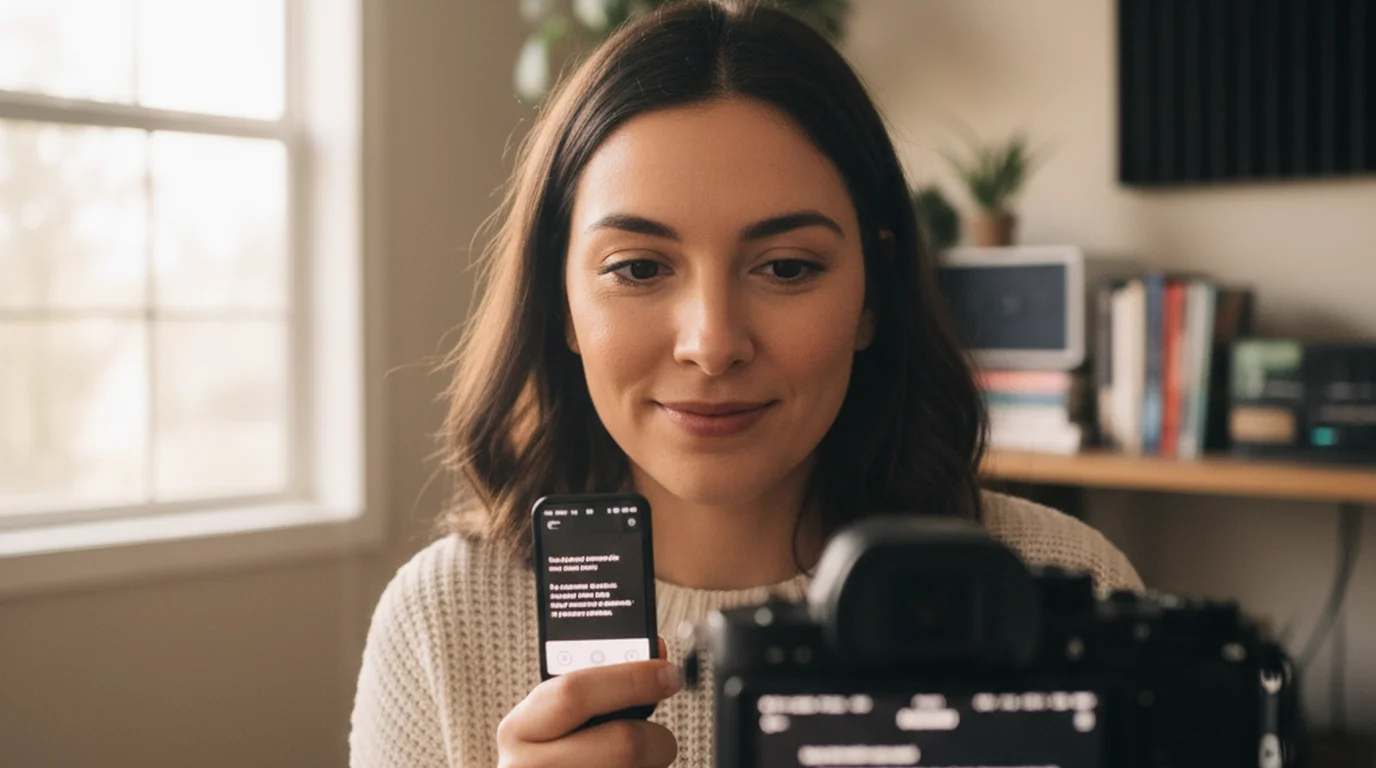
Camera integration. Can the app record video while the script scrolls, or do you have to run the camera separately? If it's two separate tools — teleprompter on one screen, camera app open beside it — you lose control of the recording the moment you need to adjust the scroll. A native Camera mode inside the teleprompter app handles both in one pass.
Text position control. Can you put the text close to the lens, or is it locked to the center of the screen? Text centered on a phone screen means your eyes are pointing at your chest, not the camera. The ability to drag the text area to the top 15–20% of the frame, directly below the lens, is what creates natural-looking eye contact on camera. Browser-based teleprompters cannot do this — they don't have access to the camera view to know where the text is in relation to the lens.
Pause and manual control during recording. Real recording sessions don't run at one constant speed. You need to pause mid-sentence to re-read, hold on a point, or recover from a stumble — without stopping the camera. A teleprompter for video recording needs touch or voice pause control that works independently from the recording itself.
A browser teleprompter fails all three tests. A native app with Camera mode — like Teleprompter-Scrolling Scripts — handles all three by design.
The deciding factor for a camera prompter is whether the text and the lens are on the same device. When they are, you control both from one interface. When they aren't, every adjustment is a trade-off.
Camera mode: recording video while reading a script
Camera mode is the video recording workflow inside Teleprompter-Scrolling Scripts. Here's exactly what it does.
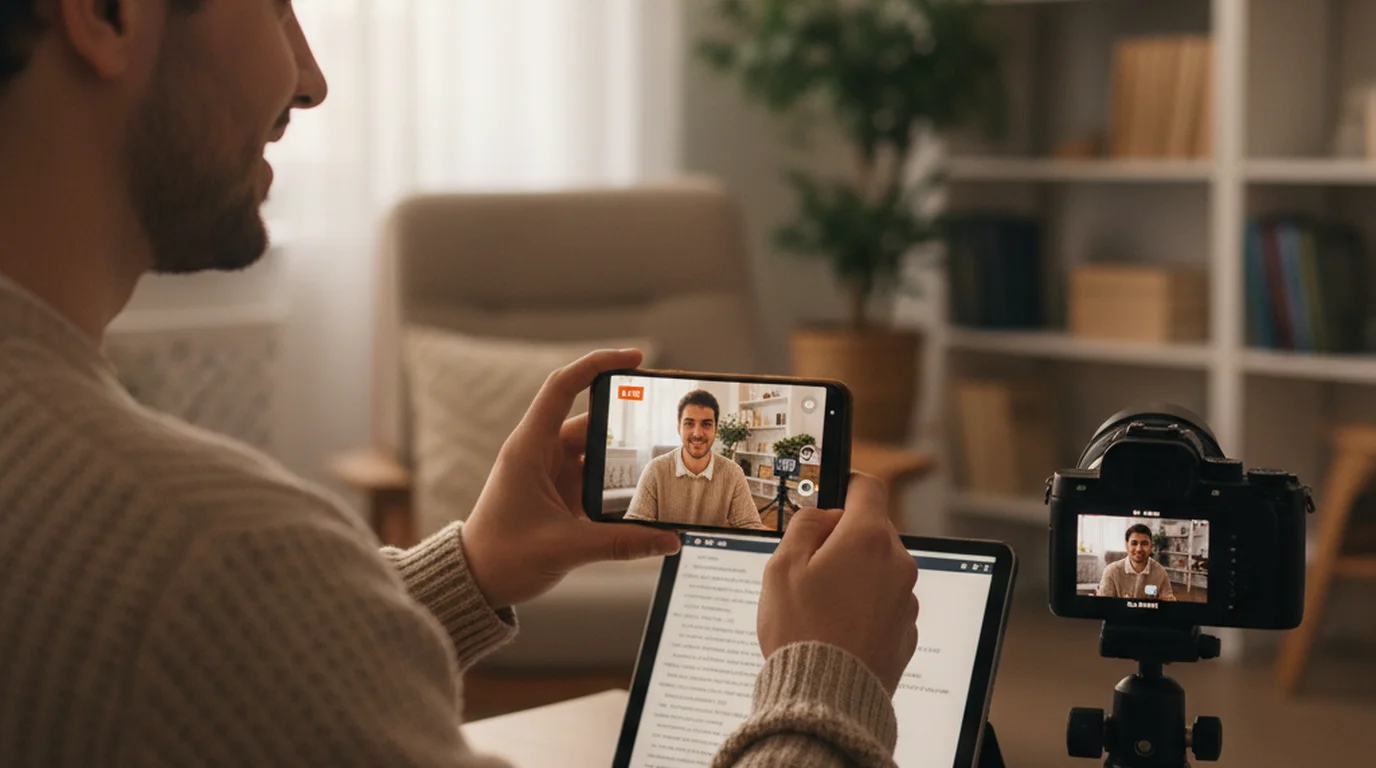
When you open Camera mode, the app activates the device camera and shows the live camera view on screen. The script overlays on that live view as scrolling text. You see yourself (or your background) behind the text. You read the script. The app records the video — not just the camera feed, but the clean camera feed without the script visible in the recording. The text is a display layer, not a video element. The recorded clip is the clean video.
On iPhone, Camera mode supports both front and back cameras. Front camera is standard for talking heads, selfie-style TikTok, and YouTube vlogs. Back camera is better for demos, product reviews, and situations where you want the higher-resolution camera with a tripod setup. Switch cameras from inside Camera mode without interrupting the session.
On Mac, Camera mode activates either the built-in FaceTime camera or a connected USB or Thunderbolt webcam. This is the full desk recording workflow — script scrolling, recording, eye contact calibration, all inside one app. The recorded video saves to your specified folder.
After recording, the clip saves to your camera roll (iPhone/iPad) or your chosen folder (Mac). No export step. Open it, review it, done. If you prefer not to install anything, the online teleprompter handles basic script scrolling in any browser — though it cannot record video directly.
Setting up a teleprompter app for iPhone video recording
This is the full step-by-step for iPhone video recording with Teleprompter-Scrolling Scripts.
- Create or paste your script. Keep paragraphs short — three to four sentences maximum. Short paragraphs scroll cleanly and are easier to follow without losing your place.
- Open Camera mode. The live camera view appears with the script overlaid.
- Choose front or back camera. Front camera for talking heads and direct-to-camera content. Back camera for demos and over-the-shoulder shots.
- Set orientation. Portrait for vertical video (TikTok, Instagram Reels, YouTube Shorts). Landscape for horizontal video (YouTube, course recordings).
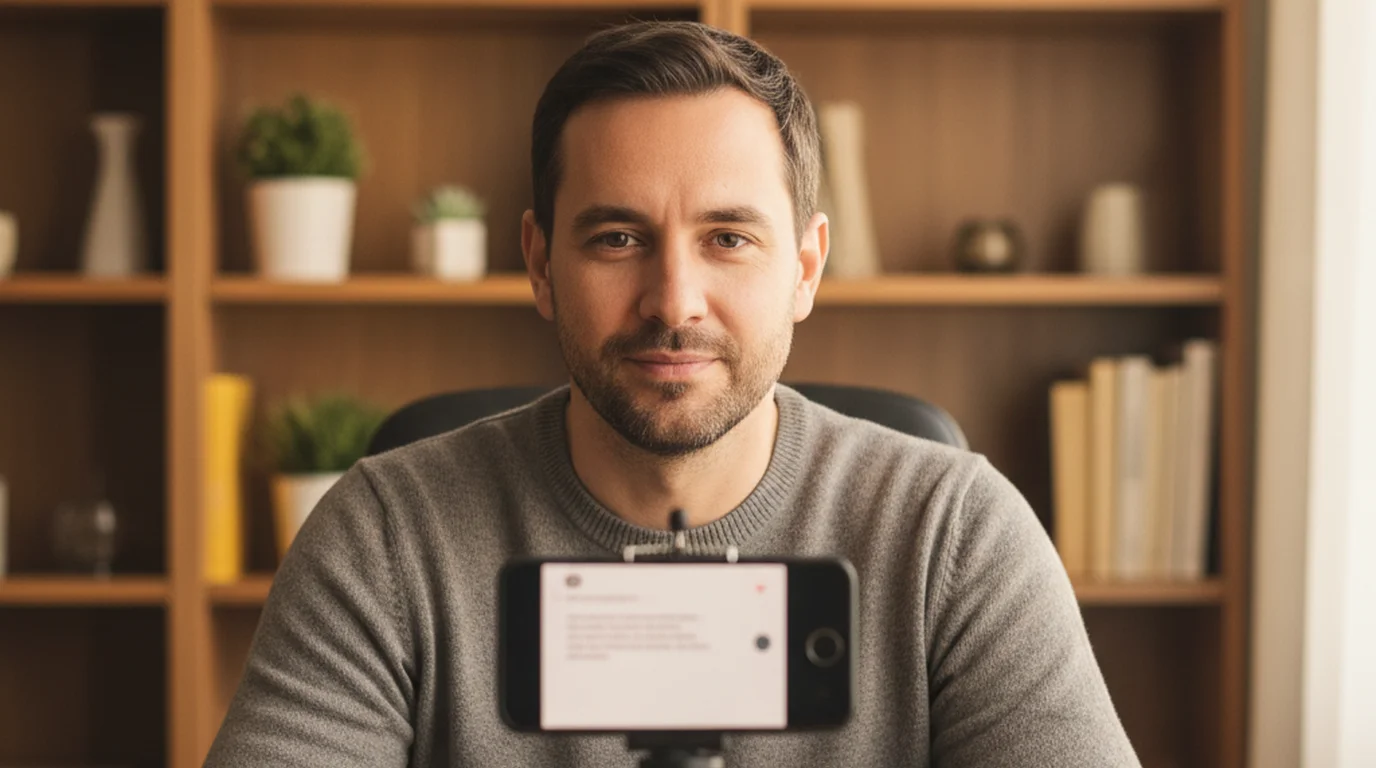
- Drag the text area to the top 20% of the frame. The text should sit directly below the lens — not in the center, not at eye-level. Directly below the camera lens.
- Set text size based on recording distance. Stand or sit where you'll actually record. Adjust size until you can read without squinting. If you have to lean toward the phone to read, it's too small.
- Do one speed rehearsal. Run through the first 30–60 seconds of the script without recording. Adjust scroll speed until it feels 10–15% slower than your natural delivery pace.
- Record.
iPhone tip: use a phone stand or tripod. Handheld recording while running a teleprompter means both hands are occupied — one holding the phone, one potentially adjusting the scroll. A stand frees both hands and stabilizes the frame.
Setting up a teleprompter app for Mac desk recording
The Mac desk recording setup is slightly different because the screen is larger and you're typically farther from the camera.
- Create your script. For desk recording, scripts can be longer — the Mac screen gives you more room to read comfortably. Still keep paragraphs short for scroll clarity.
- Open Camera mode. The FaceTime camera or connected webcam activates.
- Position the text area in the top center of the screen. The MacBook FaceTime camera sits at the top center of the display. Position the text area directly below it — not in the top-left or top-right. Below the camera dot.
- Set a narrow text column. Don't use full-screen width. Limit the column to roughly 40–50% of screen width, centered. This reduces horizontal eye movement, which is visible on camera even at desk distance.
- Adjust font size to your sitting distance. Sit at your recording position. Set the font so you can read clearly without leaning in. For a standard MacBook at arm's length, this is usually a larger size than you'd expect.
- Set scroll speed slightly slow. Desk recordings have more natural pauses than phone recordings. Give yourself room.
- Rehearse the first 30 seconds. This catches any phrasing that sounds awkward when spoken aloud and confirms your scroll speed.
- Record.
Mac tip: check your room lighting before recording. Camera mode shows the live background in the frame. Uneven lighting, busy backgrounds, or windows creating harsh backlight are all visible — and easier to fix before you start than in post.
Script format tips that make video recordings sound natural
The script you read on a teleprompter is not the same document you'd write for an article or a slide deck. Scripts written for reading look fine on paper. Scripts written for speaking sound natural on camera. The difference comes down to five formatting habits.
Sentences under 20 words. Longer sentences require more breath, more tracking across the text, and more working memory to hold the meaning while still delivering it naturally. Short sentences are easier to read, easier to say, and easier for the audience to follow.
Paragraphs under four sentences. Short paragraphs create natural scroll checkpoints. When a paragraph ends, there's a visible break in the text. That break signals a natural pause in delivery — and helps you find your place if you stumble.
Write contractions. "I'm" not "I am." "It's" not "it is." "You're" not "you are." Written language and spoken language have different registers. Contractions match spoken register. Full forms sound formal and stiff when read aloud.
No subordinate clauses. "The feature, which was originally designed for a different use case but has since been adapted, now works well." That's a nightmare to read off a scroll. Break it into two sentences: "The feature was originally designed for something else. It's since been adapted and now works well."
Read the script aloud before recording. Every script has at least one sentence that looks fine in text but trips you up when spoken. Read it through once before you open Camera mode. Fix anything that doesn't flow naturally when said aloud.
What separates a great teleprompter app from a basic one
Most teleprompter apps can scroll text. The difference shows up when you're actually in a recording session — and it shows up fast. A basic app gives you a scrolling window. A great teleprompter app for video recording gives you control over five things that determine whether the session works.
Camera mode (must-have). This is the single most important feature. If the app doesn't record video while the script scrolls, you're running two separate tools — one for prompting, one for recording — and they don't talk to each other. Camera mode keeps everything in one workflow: you read, the camera records, the text never appears in the final clip.
Script management: local vs. cloud. A cloud-based app requires an account, an internet connection, and a working sync before you can read your own script. A local-first app opens instantly with your scripts already there — no login, no upload, no third-party server handling your content. For creators working on unpublished material — course content, product announcements, client pitches — local storage is the more professional choice.
Layout control. Text size, scroll speed, column width, and text area position are not cosmetic settings. They determine whether your eyes stay near the lens during a take. An app without precise layout control forces you to work around its defaults. An app with real layout control lets you dial in the setup once and save it for every future session.
Multi-device support. If you record vertical clips on iPhone, long-form content on iPad, and desk recordings on Mac, you need an app that behaves consistently across all three. Switching apps mid-workflow — or relearning a different interface for each device — adds friction you don't need.
Free vs. paid. The core features that matter for most recording workflows — Camera mode, layout control, local storage, multi-device support — don't require a subscription. Paid tiers typically add AI script generation, remote hardware control, or team collaboration. Those are useful in specific contexts, but they're not the reason a recording session succeeds or fails. Start with a free app that has Camera mode and evaluate from there.
Teleprompter app checklist before every recording session
Run through this before every session. It takes 90 seconds and eliminates the most common reasons for wasted takes.
- Script finalized, broken into short paragraphs, read aloud once.
- Camera mode selected and correct camera (front/back, iPhone/Mac) confirmed.
- Text area positioned in the top 15–20% of frame, below the lens.
- Column width narrow — not full screen width.
- Font size confirmed readable at actual recording distance.
- Scroll speed set — slightly slower than comfortable delivery pace.
- One rehearsal pass completed, speed adjusted if needed.
- Lighting checked — no harsh backlight, no uneven shadows.
- Background checked — nothing distracting in the camera frame.
- Record.
The checklist is not about being slow. It's about not burning the first three takes on setup problems that take 90 seconds to fix in advance.
Free vs. paid: what you actually need
The teleprompter app market runs from completely free to subscription-based products charging monthly. The honest answer is that the paywall often lands in the wrong place for most creators.
Here's what's genuinely behind paywalls in most paid teleprompter apps: AI script generation (drafts a script from a prompt or topic), remote hardware control (a physical remote or second-device scroll trigger), and team features (shared script libraries, multi-user access). If you work in a broadcast studio, run a content agency, or present frequently with a hardware remote, those are real features worth paying for.
Here's what free tiers typically cover: Camera mode, local script storage, text size control, scroll speed adjustment, and column width settings. For a solo creator, educator, or coach recording video on iPhone, iPad, or Mac, that's everything you need to run a professional recording workflow.
Teleprompter-Scrolling Scripts is free on the App Store with no subscription. Camera mode, Prompter mode, adjustable text size, scroll speed, text area positioning, and local script storage are all available without a paywall. You're not locked out of the recording workflow behind a trial timer or a feature gate.
The practical test: download a free app, run it through a real recording session with your actual script, and see if anything is missing. If a paid feature solves a real problem you encounter in that session, it's worth it. If it doesn't come up, it probably isn't.
How to evaluate any teleprompter app before you rely on it
The standard evaluation mistake is testing a teleprompter app with a sample paragraph at a desk in good lighting. That tells you almost nothing about how it performs when a recording session actually depends on it. Here's a more useful approach.
Test scroll speed calibration with your real script. Paste the actual script you plan to record — not a sample sentence. Read through it in Camera mode at your intended recording pace. Adjust the scroll speed until your delivery doesn't feel rushed or held back by the text. Scroll speed is the setting that breaks most sessions, and it only reveals itself with real content at real length.
Test Camera mode before shoot day. Don't open Camera mode for the first time during an actual recording. Open it at least once in advance — on the device you'll use, in the orientation you'll record in. Confirm the text area can be positioned near the lens, confirm the layout controls work the way you expect, and confirm the video saves correctly after a take. A three-minute test run eliminates the category of problems that only surface mid-shoot.
Check script sync and offline access. Close your network connection and open the app. Your scripts should be there immediately. If they're not — if the app requires internet to load, or shows a sync error — you have a local-first problem that will surface at the worst time: on location, in a studio with no guest Wi-Fi, or between takes with no time to troubleshoot.
Run these three checks on any teleprompter app before you build it into your workflow. The best teleprompter app for video recording is the one that passes all three without adjustments.
Frequently Asked Questions
Can I record video directly inside a teleprompter app?
Yes. Camera mode in Teleprompter-Scrolling Scripts opens the device camera, overlays the scrolling script on the live view, and records the video internally. The text layer doesn't appear in the recording — it's a display overlay only. The finished clip saves to your camera roll automatically.
What is the best teleprompter app for video recording on iPhone?
Teleprompter-Scrolling Scripts is free and supports Camera mode on iPhone with front and back camera, portrait and landscape orientation. Scripts are stored locally — no account or internet required. It's available on the App Store and works on all current iPhone models.
How do I use a teleprompter app with a Mac camera?
Open Camera mode in Teleprompter-Scrolling Scripts for Mac. The app activates the FaceTime camera or a connected webcam. Position the text area in the top center of the screen directly below the camera dot, limit the column width to about 40% of screen width, set font size based on your sitting distance, and record. The video saves to your Mac.
Does the teleprompter app save the recorded video?
Yes. Camera mode saves the recorded video to your camera roll after each take — to the Photos app on iPhone and iPad, or to your specified folder on Mac. There is no export step. The clip is available immediately after you stop recording.
 Wendy ZhangI build Teleprompter-Scrolling Scripts for creators who want a simple, reliable way to read scripts on iPhone, iPad, and Mac.
Record cleaner video with Teleprompter-Scrolling Scripts
Free teleprompter app for iPhone, iPad, and Mac. Camera mode handles the recording and the scroll in one workflow. No account, no internet, no extra apps.
Use Free Online Teleprompter Get the Free App