The Complete Podcasting Equipment List for Beginners (2026)
 Natalie Brooks · May 30, 2026 · 9 min read
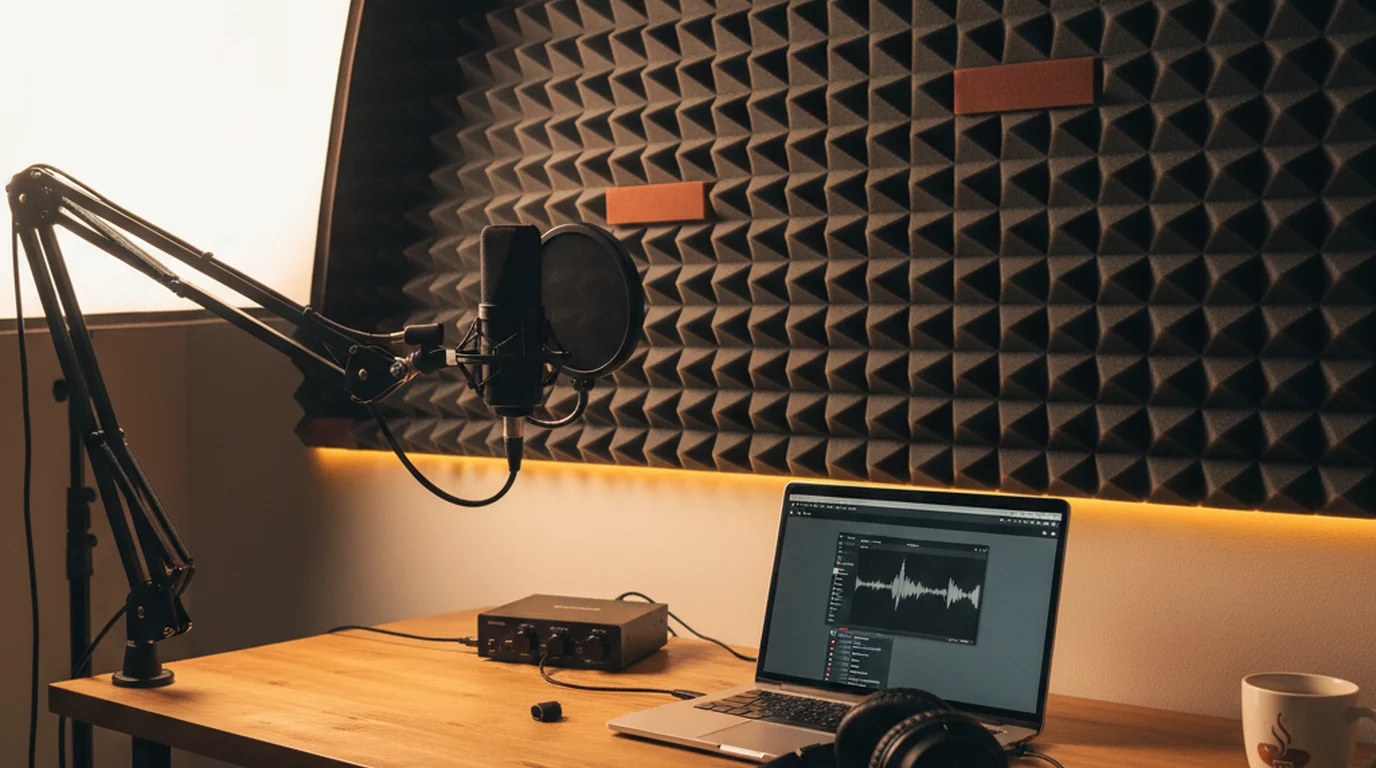
I've helped more than a dozen music and beauty clients launch podcasts from scratch — usually in a spare bedroom, usually without a budget that would make a gear reviewer blink. What I've found is that beginners spend money in exactly the wrong order: they buy expensive acoustic panels before they own decent headphones, or they agonize over XLR microphones before they've recorded a single episode. This list is built the other way around.
The essential podcasting equipment for a beginner is a USB microphone ($50–$130), a pair of closed-back headphones ($30–$80), and free recording software. That's a functional solo podcast setup for under $200. Everything else — audio interfaces, XLR mics, acoustic panels — is an upgrade you earn after your first ten episodes, not a prerequisite for publishing episode one.
1. USB Microphone — Start Here
A USB microphone is the single most impactful piece of podcasting equipment a beginner can buy. It plugs directly into your laptop, shows up immediately as an audio input, and requires zero additional hardware to get a signal that sounds like a real podcast. If you record on a phone instead, the roundup of the best audio recording apps for iPhone covers which app to pair with it.
Here are picks at three budget tiers:
Budget tier ($40–$90)
- Blue Snowball iCE (~$50) — The most forgiving mic in this price range. Cardioid pattern, no extra switches to mess with, decent rejection of room noise.
- Samson Q2U (~$60) — Cardioid dynamic, USB and XLR outputs. I recommend this to anyone who suspects they'll eventually want to upgrade to a proper interface setup, because you can run it USB now and XLR later without buying a second microphone.
Mid tier ($100–$180)
- Rode NT-USB Mini (~$99) — Compact, tight cardioid pattern, built-in headphone monitoring with near-zero latency. Sounds noticeably more expensive than it is.
- Blue Yeti (~$130) — The default recommendation for a reason. Four polar patterns means you can record a two-person in-person interview without repositioning the mic.
Upper tier ($200–$270)
- Shure MV7 (~$230) — Dynamic capsule, USB and XLR outputs, and a proprietary DSP app for real-time voice EQ. Sounds closer to a broadcast radio mic than any USB mic in a lower tier.
Which one to buy: If you have no idea whether podcasting will stick, get the Samson Q2U. If you know you're committed, jump to the Rode NT-USB Mini or Shure MV7 and skip the mid-range.
2. Headphones — The Most Underrated Piece of Podcasting Equipment
Most podcasting equipment guides bury headphones in a footnote. That's a mistake. You need closed-back headphones for two specific reasons: monitoring your audio while recording, and editing so you catch mouth clicks, breath noise, and plosives that you'll miss on laptop speakers.
Open-back headphones sound better for critical listening but bleed audio into your microphone during recording. Closed-back over-ear headphones are the correct category.
- Audio-Technica ATH-M20x (~$50) — Flat response, comfortable, works.
- Sony MDR-7506 (~$95) — The industry default in broadcast and studio monitoring for thirty years. Slightly bright on the high end, which is useful for catching sibilance problems in your vocal recording.
Spending more than $150 on headphones for podcast monitoring is hard to justify until you're doing serious post-production work.
3. Recording Software — Free Is Fine
There is no recording software you need to buy to start a podcast. Here's what works at $0:
- Audacity (Windows, Mac, Linux) — Open source, handles multitrack recording, has basic noise reduction and EQ. Does everything you need for a solo or two-person show.
- GarageBand (Mac, iPhone, iPad) — Cleaner interface than Audacity, ships free on every Apple device. If you're already in the Apple ecosystem, start here.
- Riverside.fm (free plan available) — If you have remote guests, Riverside records each participant's audio locally on their own machine and syncs it afterward.
According to a 2024 Riverside.fm State of Podcasting report, 64% of podcast listeners say audio quality is one of the top three factors in whether they subscribe to a show after the first episode.
4. Audio Interface + XLR Mic — The Upgrade Path
If you start with a USB mic and find yourself wanting better sound, the upgrade path is an audio interface plus an XLR condenser or dynamic microphone. An audio interface converts analog XLR signals to digital audio your computer can work with.
The Focusrite Scarlett Solo (~$120) and Focusrite Scarlett 2i2 (~$170) are the workhorses here. The 2i2 has two XLR inputs, which means you can record two guests in-person on separate mics.
XLR microphone pairings that work well with the Scarlett:
- Audio-Technica AT2020 (~$100) — Large-diaphragm condenser. Works beautifully in a treated room. Only choose this if your acoustic situation is solid.
- Shure SM7B (~$400) — The broadcast standard. This is a $470+ system and is not a beginner purchase unless you have a specific professional reason.
- Rode PodMic (~$100) — Dynamic, broadcast-voiced, built to reject off-axis room noise. Sounds significantly better than its price suggests.
The honest take: Unless you're launching a monetized show from day one, you don't need this setup yet. Most successful indie podcasts started on USB mics.
5. Acoustic Treatment — The DIY Options That Work
This is the section most beginner podcasting guides get wrong. They show you expensive foam tiles and vocal booths when the real solutions cost almost nothing.
Record in a closet. A walk-in closet packed with clothes is one of the best acoustic environments in most homes. The clothing absorbs reflections, the small space limits early echoes, and the irregular surfaces of hanging garments break up standing waves.
Moving blankets behind you. A single furniture moving blanket (~$10–$15 from any hardware store) hung on the wall directly behind your recording position absorbs a significant amount of rear reflection.
Distance and positioning. Stay 4–6 inches from your mic — not 12 inches away. Closer distance means your voice-to-room ratio improves dramatically without any acoustic treatment at all.
What doesn't work: Egg cartons (a persistent myth — they don't have the density to absorb meaningful frequencies), thin foam stickers on walls, and recording in large open rooms with hard floors.
According to acoustic engineer Bob Golds of Acoustics.com, room modes in typical rectangular home recording spaces affect frequencies between 80–300 Hz most severely — the exact range where voice recordings often sound muddy or resonant.
6. Video Podcast Setup — Using Your iPhone as a Camera
Video podcasting isn't optional anymore. According to Spotify's 2025 creator data, video podcast episodes generate 40% more engagement than audio-only episodes when distributed on the same platform. YouTube is now the second-largest podcast listening platform.
iPhone cameras — specifically anything from iPhone 12 Pro onwards — shoot 4K at 30fps in conditions that would have required a dedicated mirrorless camera five years ago.
A minimal video podcast setup using iPhone:
- Mount your iPhone on a tripod at eye level — read our guide to the best phone video tripods for mounts that actually stay stable during long recording sessions
- Lock exposure and focus manually (tap and hold on your face in the Camera app)
- Record in 4K 30fps (Cinematic mode introduces unnecessary focal blur for talking-head video)
- Use your podcast USB mic as your audio source, captured into your DAW separately, then sync in post
For gimbal-stabilized setups where you're moving during recording, the best iPhone gimbal stabilizers for video creators are worth the investment once you've outgrown a static tripod setup.
7. The Teleprompter Angle — For Solo Video Podcast Episodes
Here's something most podcasting equipment guides skip entirely: delivery tools matter as much as recording tools, especially for solo video episodes. A guest-format podcast has natural energy because conversation is inherently dynamic. Solo episodes — especially educational or opinion-driven ones — live or die on your delivery.
A teleprompter splits the difference. You write your talking points with structure and transitions, then scroll through them at your natural speaking pace while the camera records. You're not reading verbatim — you're using prepared text as a guardrail so your thought stays on track without your delivery becoming stiff.
I started using Teleprompter-Scrolling Scripts for client video work about four years ago, specifically for product explainer videos where the client needed precision without an autocue rig. The Camera mode puts your script text directly over the live iPhone viewfinder — so you read and record on the same device, eyes near the lens, without any mirror hardware.
The workflow I recommend for solo video podcast episodes: write a structured outline with full sentences for transitions and key points, paste it into Teleprompter-Scrolling Scripts, set the scroll speed to match your natural talking rhythm (around 140–150 words per minute for most people), and record. Review the take once. Ship it.
For a deeper look at building scripts for AI-assisted video content, this walkthrough on AI script generators covers how to use an AI draft as a starting point and then edit it into something that actually sounds like you.
8. What You Don't Need to Buy
Being direct about what to skip saves you real money:
Soundproofing booths. Products like the Kaotica Eyeball (~$100) or portable isolation shields (~$40–$150) improve high-frequency reflection slightly. They do almost nothing for low-frequency room sound, which is where most recording problems live.
A $500+ microphone for episode one. The Shure SM7B, Neumann TLM 102, and similar broadcast mics sound extraordinary. They also require proper gain staging, a treated room, and enough experience to set them up correctly. On an untreated desk with a cheap preamp, they often sound worse than a $99 Rode NT-USB Mini.
A mixer with more channels than you have inputs. For a solo or two-host podcast, you need 1–2 inputs. A Focusrite Scarlett Solo does this job better for less money.
Pop filters on dynamic mics. Dynamic microphones like the Samson Q2U and Shure MV7 handle plosives significantly better than condensers. Pop filters are genuinely useful on condenser mics; on dynamics they're mostly theater.
A "podcast starter kit" bundle. Almost every major audio brand sells a boxed bundle that includes a mid-grade mic, a sub-par arm, cheap headphones, and a pop filter. Each individual component in the bundle is the worst option at its price point. Buy the pieces separately.
Frequently Asked Questions
What podcasting equipment do I actually need to start?
At minimum: a USB microphone, a pair of closed-back headphones, and free recording software like Audacity or GarageBand. That's it. A quiet room matters more than any piece of gear. You can add an audio interface and XLR mic later when you've decided podcasting is worth the upgrade investment.
Is a USB mic or XLR mic better for a beginner podcast?
USB mic — no question. A USB microphone plugs directly into your laptop with zero additional hardware. XLR mics require an audio interface, cables, and more setup. XLR unlocks better long-term quality, but a good USB mic like the Rode NT-USB Mini or Shure MV7 (which has both USB and XLR) sounds professional and keeps your first episode simple.
Do I need acoustic treatment to start a podcast?
You don't need foam panels or a vocal booth. What you do need is a room with soft surfaces. Record in a closet full of clothes, or hang a moving blanket behind you. The single biggest acoustic improvement for most beginners costs nothing: close the door, turn off the HVAC, and move away from reflective walls.
Can I record a video podcast on iPhone?
Yes — and iPhone camera quality in 2026 is genuinely broadcast-ready. Mount your iPhone on a tripod at eye level, set exposure manually, and record in 4K. For solo episodes where you want to deliver talking points naturally without constant cuts, run Teleprompter-Scrolling Scripts on a second device or use the app's Camera mode so your script scrolls over the live viewfinder. For audio-only episodes, Voice mode records the sound and scrolls the script from the same screen, which removes the second device entirely.
What recording software should beginners use for podcasting?
Free first: Audacity (Windows/Mac/Linux) and GarageBand (Mac/iPhone) are both completely capable for a solo or two-person show. If you want remote guest recording built in, Riverside.fm and Zencastr record each participant locally, which means better audio quality than a simple Zoom call. Start free, upgrade when you hit a real limitation.
Do I need acoustic treatment for a podcast recording space?
You don't need a purpose-built acoustic space, but some treatment makes a significant difference. The biggest culprit in home podcast audio is hard surfaces — tile, hardwood, bare walls — that create reverb and room echo. Soft furnishings absorb these reflections: carpet, upholstered furniture, bookshelves, heavy curtains. Recording in a walk-in closet full of clothing is a classic podcaster trick precisely because the clothes absorb reflections. You can spend $0 on acoustic treatment (choose a carpeted, furnished room) or $20–50 on foam panels for the wall behind and beside the microphone. Full acoustic panel installation is rarely necessary for podcast quality audio.
Natalie BrooksNatalie Brooks is a video producer who works as a one-person crew for independent creators, corporate teams, and online educators. She writes about home studio setups, creator gear, and the production decisions that never come up in sponsored unboxings.
Record your first scripted podcast episode today
Teleprompter-Scrolling Scripts runs natively on iPhone, iPad, and Mac. Camera mode lets you record while your script scrolls over the live viewfinder — no mirror hardware, no second device.
Use Free Online Teleprompter Get the Free App