Best Free Autocue App for Mac and MacBook (2026)
![]() Wendy Zhang · May 20, 2026 · 9 min read
Wendy Zhang · May 20, 2026 · 9 min read
The best autocue app for Mac is Teleprompter-Scrolling Scripts — free to download, works on MacBook Air and MacBook Pro, and lets you record video while reading your script directly on screen. If you'd rather not install anything, teleprompter.works/online works in any browser on Mac.
What is an autocue app for Mac?
"Autocue" is the British English word for what North Americans call a teleprompter. The term comes from Autocue Ltd., a UK company that developed its own version of the script-display system in the late 1950s, around the same time the American Teleprompter Corporation was establishing itself in the United States. Both words describe exactly the same technology: a system that displays scrolling script text so a speaker can read while maintaining eye contact with a camera or audience. If you'd like a fuller explanation of how the two terms differ historically, see our FAQ on the difference between autocue and teleprompter.
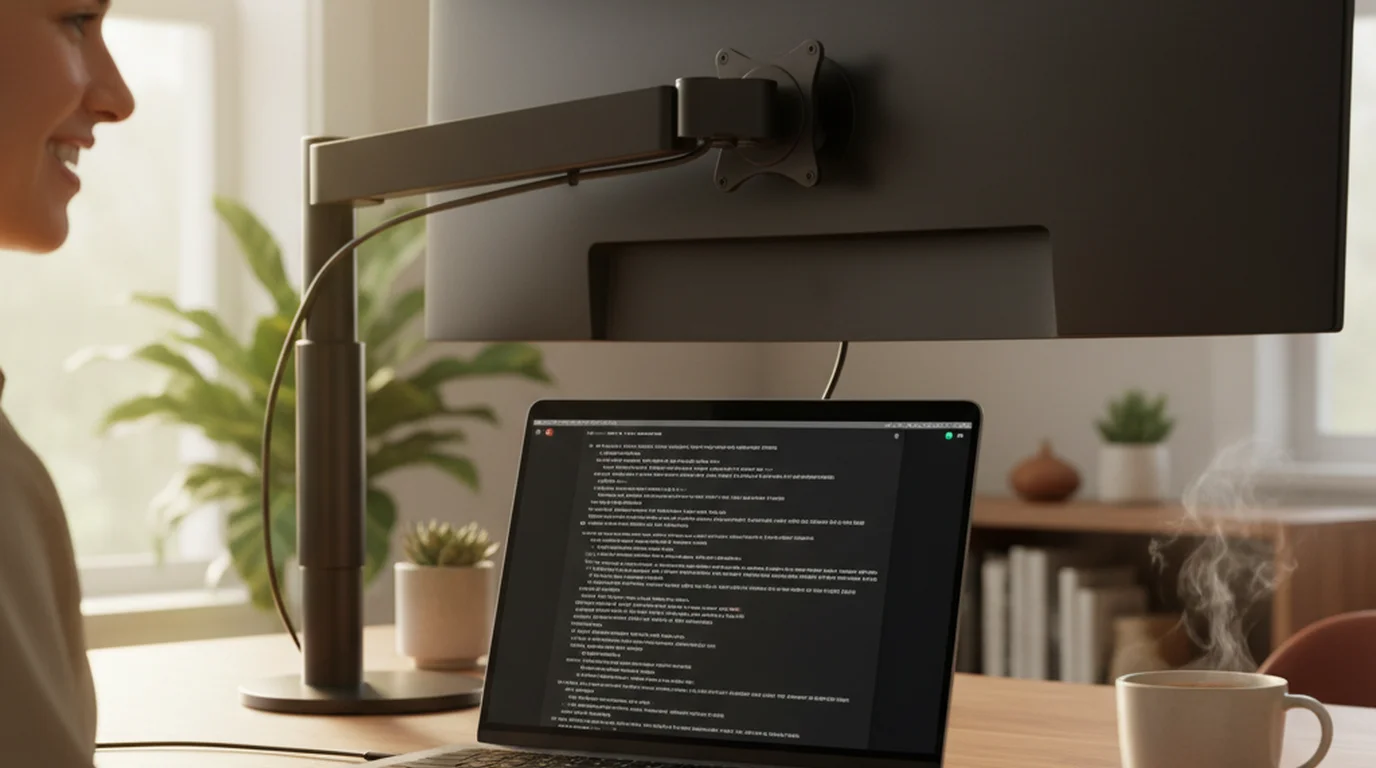
A Mac-based autocue app replaces the traditional hardware rig — the beam-splitter glass, the dedicated monitor, the operator — with software running on the Mac you already own. The app displays your scrolling script on the Mac screen, positioned near the built-in webcam, while the camera records. The result is a complete autocue system that requires no additional equipment, no cables, and no setup beyond downloading the app and pasting your script.
For desk recording, online video, Zoom calls, and solo content creation, a Mac autocue app is not just a convenient shortcut — it is genuinely the optimal setup. The Mac sits at natural eye level on a desk, the screen is large enough to display comfortable font sizes at normal recording distances, and the workflow integrates seamlessly with any recording or streaming software.
Why Mac is an excellent autocue device
Not all autocue setups are created equal, and Mac has several characteristics that make it particularly well-suited for the job.
Camera placement: MacBook models have their FaceTime HD camera (or the upgraded 1080p camera on newer models) built into the top bezel of the display. This positions the lens at the top of the screen, close to where text naturally appears when you are reading. The smaller the angle between "where the script text is" and "where the camera lens is," the more natural the resulting eye contact looks on video. Mac's camera-in-bezel design is genuinely better for this purpose than many external webcam setups where the camera sits on a separate mount above or beside the monitor.
Continuity Camera: If you own a recent iPhone, you can use it as your Mac's webcam over USB or wirelessly via Continuity Camera. This lets you combine the optical quality of the iPhone camera with the convenience of Mac-based script display, giving you a setup that rivals mid-range broadcast cameras at zero cost beyond the devices you already own.
Screen size and readability: Even the 13-inch MacBook Air offers enough screen real estate to display 36–48pt text comfortably at arm's length. The 14-inch and 16-inch MacBook Pro models, and especially external displays connected to any Mac, provide even more room for a wide, readable text column. Compared to reading a teleprompter script off a 6-inch phone screen at the same distance, Mac is significantly easier on the eyes and requires less concentration to track the scrolling text.
Stability: A Mac on a desk is inherently more stable than a phone or tablet being held or propped up. Stable positioning means consistent framing, consistent eye contact angle, and fewer accidental bumps that interrupt a recording session.
Software ecosystem: Mac runs the full native version of Teleprompter-Scrolling Scripts, the same app available on iPhone and iPad. Scripts sync across devices via iCloud if you use the same Apple ID, so a script written on iPhone during a commute is available immediately on Mac when you sit down to record. The Mac also runs every major video recording and editing tool, making post-production part of the same seamless workflow.
The combination of these factors is why desk-based video creators, online educators, and corporate video producers consistently gravitate toward Mac as their autocue device of choice when they are not using dedicated broadcast hardware.
Teleprompter-Scrolling Scripts for Mac — the free autocue
Teleprompter-Scrolling Scripts is a native Mac app available free from the App Store. It is built specifically for Apple platforms and takes full advantage of macOS features rather than being a cross-platform web wrapper or ported mobile app. Here is what you get at no cost:
- Camera mode: Overlays your scrolling script directly on the live camera feed. You see both the camera view and the script text simultaneously, so you can monitor your framing while reading. Recording happens through the Mac's built-in camera or any connected external camera.
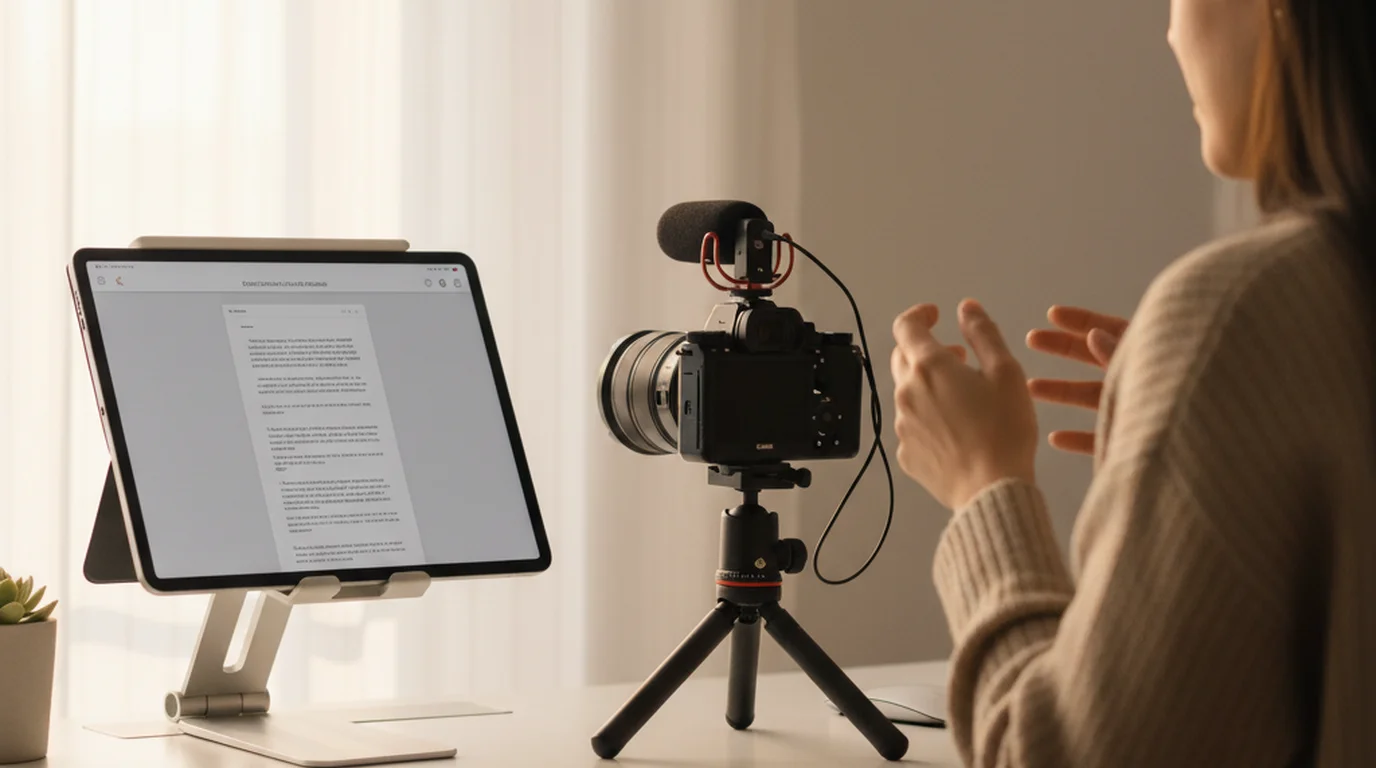
- Prompter mode: Displays the script full-screen, centered and scrolling, without activating the camera. This is ideal for rehearsal, for using the Mac as a standalone prompter display while a separate camera records from a different angle, or for live presentations where you need a clean text display on a monitor facing you.
- Adjustable font size: Scale text from small to very large to suit your recording distance. For a MacBook at arm's length, 40–48pt is typically comfortable without being distracting.
- Adjustable scroll speed: Set the speed in words per minute or by feel. The app provides fine-grained control so you can match the scroll precisely to your natural speaking cadence.
- Text and background color: Switch between white text on black, black text on white, or custom color combinations. Many presenters prefer white text on black for reduced eye strain and a clean on-camera look if the screen is visible in the recording frame.
- Local script storage: All scripts are stored on your Mac. Nothing is uploaded to a server. This matters for anyone working with confidential content — earnings scripts, legal statements, medical educational material — where data privacy is a consideration.
- No subscription required: The core functionality is free. There is no monthly fee to use Camera mode, Prompter mode, or any of the standard settings.
For the vast majority of Mac users who want an autocue, this app is the beginning and end of the search. It is free, native, privacy-respecting, and takes about two minutes to set up from a cold start.
How to set up Teleprompter-Scrolling Scripts as an autocue on Mac
Getting from zero to a running autocue on Mac takes fewer than five minutes. Here is the complete process:
- Download the app. Open the Mac App Store, search for "Teleprompter-Scrolling Scripts," and click Get. The app is free and installs in under a minute on any modern Mac with a reasonable internet connection.
- Create your script. Open the app and tap the "+" button to create a new script. Type or paste your content directly into the editor. Keep your sentences short and spoken-word natural — avoid long compound sentences that sound fine on paper but feel awkward when read aloud at speaking pace.
- Choose Camera mode. From the script view, select Camera mode. The app will request camera access on first use — grant this permission so the live camera feed is available as the script overlay background.
- Position the text area near the webcam. In Camera mode, the script text should appear at the top of the frame, as close as possible to the MacBook's built-in camera in the top bezel. The smaller the distance between where your eyes are pointing (at the text) and where the lens is (at the top of the screen), the more convincing the eye contact will look in the recording.
- Set font size for your recording distance. Sit at your normal recording position and adjust the font size until the text is comfortably readable without squinting or leaning in. For MacBook at a standard desk distance of 60–70cm, 40–48pt is usually the right range.
- Set scroll speed. Before recording, do a read-through with the scroll running. Adjust the speed up or down until the script is scrolling at your natural speaking pace — slightly slower than feels "right" on the first pass, because most people speed up slightly when they are actually reading for camera.
- Do one practice take. Run through the entire script once before your first recorded take. This surfaces any sentences that sound unnatural when spoken, lets you fine-tune speed, and settles your nerves so the first real take is relaxed.
- Record. Press play and start speaking. The script scrolls as you read. After recording, the video is saved to your Mac's camera roll or your chosen video recording app.
Eye level tip: The single most impactful physical adjustment you can make is raising your MacBook so the webcam sits at approximately eye level rather than looking up at you from a desk surface. A laptop stand or even a stack of books raises the camera angle dramatically. When the camera is at eye level and the text is at the top of the screen just below the lens, the resulting eye contact on video is genuinely natural-looking.
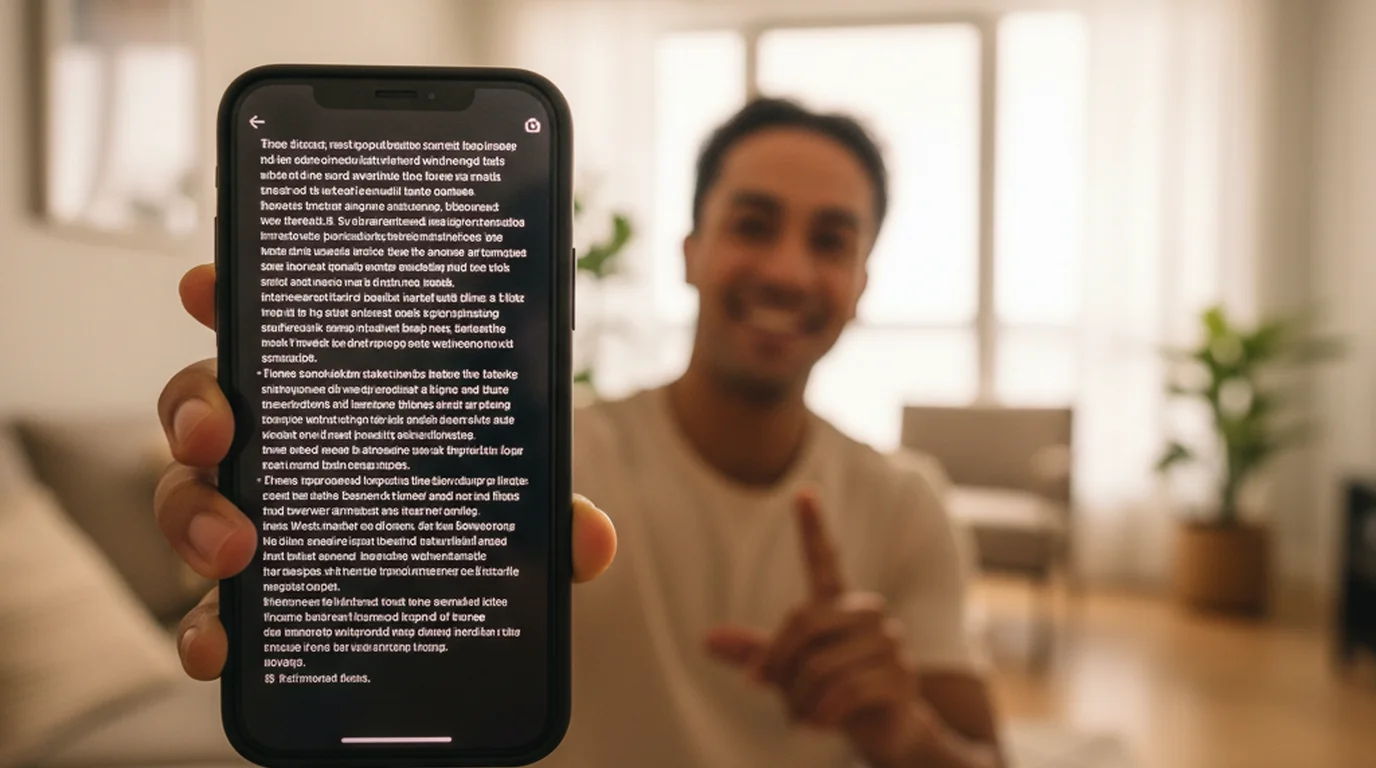
Browser-based autocue for Mac — teleprompter.works/online
If you need an autocue right now and cannot install anything — you are on a work-managed Mac, you are borrowing someone else's computer, or you simply prefer to keep things lightweight — the free web-based teleprompter at teleprompter.works/online is the fastest possible path to a scrolling script.
Open the URL in Safari, Chrome, Firefox, or any modern browser on your Mac. The interface loads immediately with no login, no account creation, and no payment step. Paste your script into the text area, set your desired font size and scroll speed using the on-screen controls, and press play. The script scrolls full-screen in the browser window.
The browser autocue works best as a standalone prompter display — you read from the browser window while a separate camera records you, or you use it for rehearsal and speech practice. It does not record video itself, but it pairs naturally with QuickTime Player's screen recording feature or any video conferencing tool like Zoom or Teams where your webcam feed is captured separately.
For one-off scripts, quick presentations, or situations where installation is not an option, teleprompter.works/online is genuinely the right tool. It requires zero setup and works on literally any device with a modern browser — including Windows PCs, Android tablets, and Chromebooks — which is why it remains a useful complement to the native Mac app even for people who use both.
MacBook Air vs MacBook Pro for autocue use
Both MacBook Air and MacBook Pro work identically as autocue devices — the software runs the same way on both, the camera quality is equivalent on comparable model years, and the user experience is the same. But there are a few practical differences worth knowing:
MacBook Air advantages for autocue recording: The MacBook Air is fanless on M-series models, meaning it produces zero fan noise during operation. For anyone recording voice-over, interview-style video, or any content where audio quality matters, this is a meaningful advantage. A MacBook Pro under load can spin up fans that are audible in sensitive microphone recordings. For solo desk recording without a dedicated microphone isolation setup, MacBook Air is the better choice.
MacBook Pro advantages for autocue use: The 14-inch and 16-inch MacBook Pro models offer substantially larger displays. More screen real estate means you can use a wider text column, a larger font size, and still have room to see the camera preview alongside the script. For presenters who find it easier to read larger text, or who want to keep a bigger portion of the camera feed visible while using Camera mode, the Pro's screen size is a real benefit. MacBook Pro also tends to offer a higher-resolution and better-performing webcam on current models.
Either model, at either price point, is fully capable as an autocue device. If you are buying a Mac specifically for autocue use, the Air's silence is a stronger differentiator than the Pro's larger screen for most solo recording scenarios. If you already own a MacBook Pro, there is no reason to favor the Air — use what you have.
Desktop Mac users — iMac, Mac mini, Mac Studio, Mac Pro with a display — have the additional benefit of potentially larger external monitors. Running an autocue on a 27-inch display at desk distance gives you enormous flexibility on font size, column width, and camera placement relative to the screen.
Autocue settings for Mac desk recording
Getting the settings right is the difference between an autocue that helps your delivery and one that makes it obvious you are reading. Here are the recommended starting points for Mac desk recording, based on typical MacBook positioning at 60–80cm from the screen:
- Font size: Start at 36–48pt. If you find yourself squinting or leaning toward the screen, increase to 50–56pt. If the text feels overwhelming or forces excessive eye movement across long lines, decrease toward 32–36pt. The goal is a font that you can read with a relaxed, natural gaze rather than effortful focus.
- Text column width: Set the column to 55–65% of the screen width. A narrower column reduces left-to-right eye scanning, which is the most obvious visual tell that someone is reading rather than speaking naturally. The tighter the column, the more your eyes stay in one zone near the camera.
- Scroll speed: 130 words per minute is a useful starting point for conversational delivery. This translates to roughly 2 words per second. Calibrate this to your natural pace: read a short passage aloud at your normal speaking speed and time yourself, then set the scroll to match. Most people find they need to run the scroll slightly slower than their first instinct, because camera nerves tend to accelerate delivery during actual recording.
- Text area position: Position the scrolling text block at the top of the screen, as close to the MacBook's built-in camera as possible. In Teleprompter-Scrolling Scripts Camera mode, drag the text area upward until it sits just below the camera notch in the bezel. This minimizes the visible angle between text and lens.
- Eye level: Raise your MacBook on a stand until the webcam is approximately level with your eyes when seated in your natural recording posture. Do not hunch toward the screen to read — if you need to lean in, increase the font size instead. The camera-at-eye-level adjustment alone makes more difference to on-screen presence than any settings change inside the app.
- Background and text color: White text on a dark background reduces the bright screen glow that can appear around the speaker's face in recordings shot in dim environments. Black text on white is fine for bright, well-lit setups. Experiment with what works in your specific lighting conditions.
These settings are starting points. The most important thing is running a 30-second test recording and watching it back before committing to a full take. Small adjustments to font size and scroll speed based on what you actually see in playback are always more reliable than setting parameters by feel alone.
Free vs paid autocue apps for Mac
For most Mac users, the free options cover everything. Here is the honest comparison:
Free options:
- Teleprompter-Scrolling Scripts (native Mac app): Free from the App Store. Camera mode, Prompter mode, adjustable font/speed/layout, local script storage, no subscription. This is the best choice for the overwhelming majority of Mac users recording solo video, online courses, Zoom content, or YouTube.
- teleprompter.works/online (browser-based): Free with no download. Best for one-off use, borrowed computers, or situations where the native app cannot be installed. Works in any browser on Mac, Windows, Linux, iOS, and Android.
Paid options:
- Teleprompter Premium and similar subscription apps: Paid teleprompter apps typically offer additional features such as remote control support, advanced video export options, script collaboration, multiple user accounts, or integration with external hardware. These features are relevant for production companies managing multiple presenters, broadcasters who need an operator to control scroll speed remotely, or organizations with centralized script libraries. For individual creators recording solo content, these features rarely justify the subscription cost.
The practical guidance: start with Teleprompter-Scrolling Scripts (free). Use it for a few recording sessions. If you find yourself consistently bumping into a limitation that a paid app solves — remote operator control, multi-person script sharing, specific export format requirements — then upgrade. Most users never reach that point.
If you are reading this on a Windows PC rather than a Mac, the browser-based option at teleprompter.works/online is the direct equivalent — no download needed, works in any browser, same free experience. For a dedicated guide on Windows autocue options, see our post on the best free teleprompter for PC and Windows.
For iPad users who want a portable autocue setup that pairs well with the Mac workflow, see our guide to the best autocue app for iPad. Many creators use iPad as their prompter display and Mac as their primary recording device, with scripts synced between them via iCloud.
Frequently Asked Questions
Is there a free autocue app for Mac?
Yes. Teleprompter-Scrolling Scripts is free on the Mac App Store. It runs natively on MacBook Air, MacBook Pro, iMac, and Mac mini, and includes Camera mode, Prompter mode, offline script storage, and no subscription requirement.
Does the Mac autocue app work on MacBook Air?
Yes. Teleprompter-Scrolling Scripts runs on all Apple Silicon and Intel MacBook Air models. It uses the built-in FaceTime camera for Camera mode and works entirely offline. No additional hardware is required.
Can I use an autocue app for Zoom calls on Mac?
Yes. Run Teleprompter-Scrolling Scripts in Prompter mode alongside your Zoom window. Prompter mode scrolls your script in a separate window without activating the app's camera, so Zoom uses your camera normally while you read.
Does the Mac autocue app work without internet?
Yes. Scripts are stored locally on your Mac. The app runs fully offline — no account, no cloud sync, and no internet connection required for scripting or recording.
 Wendy ZhangI build Teleprompter-Scrolling Scripts for creators who want a simple, reliable way to read scripts on iPhone, iPad, and Mac.
Turn your Mac into a free autocue in under two minutes — no hardware needed.
Try the Free Web App Use Free Online Teleprompter Get the Free App